 |
Welcome to the Reel Boating Forum.
From Trailer Boaters to Captains to Marine Industry Professionals, the Reel Boating Forum welcomes you to join in with other boaters and fishermen discussing topics including sportfishing, marine electronics, boating safety, boat engines and more. Use our FREE boat classifieds to sell your boat or fishing gear. Marine Industry Vendors are also welcome to register a username and freely post their products or services |

parrott
-
Posts
63 -
Joined
-
Last visited
Content Type
Profiles
Forums
Events
Everything posted by parrott
-
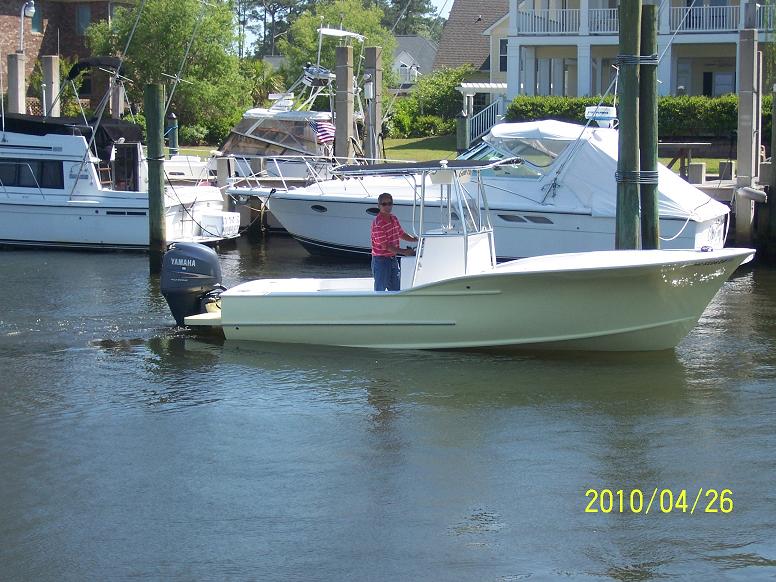
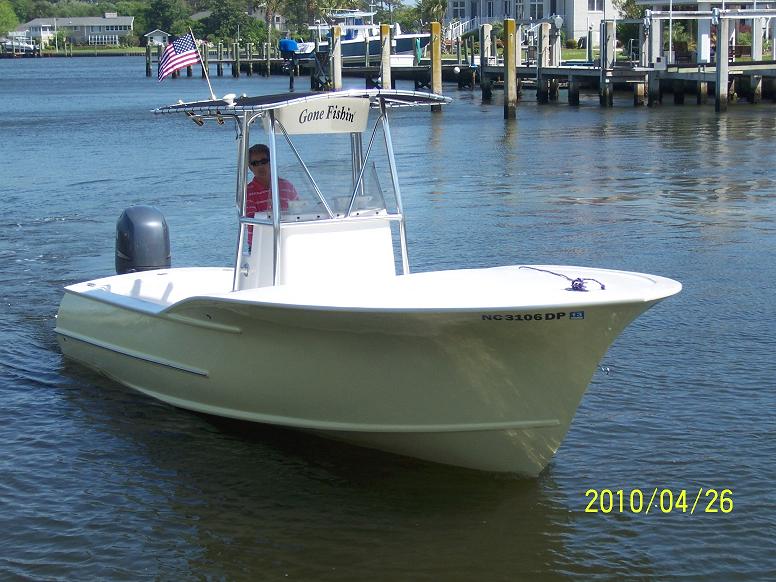
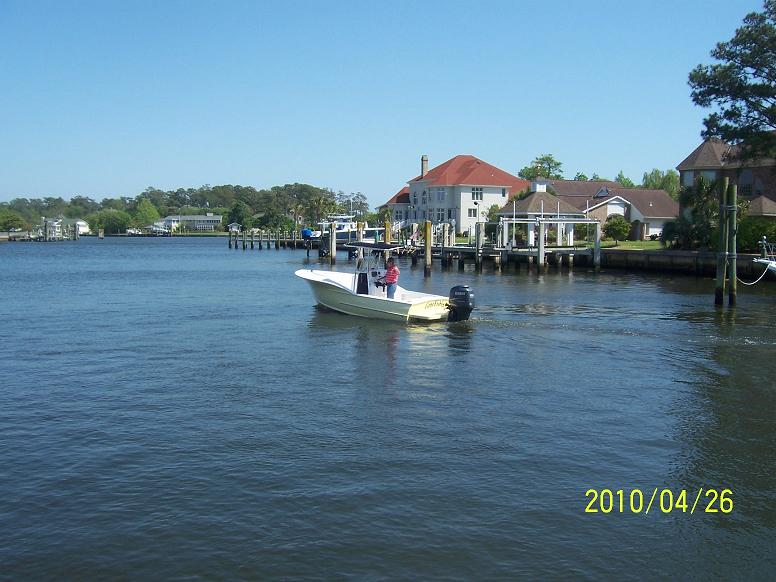
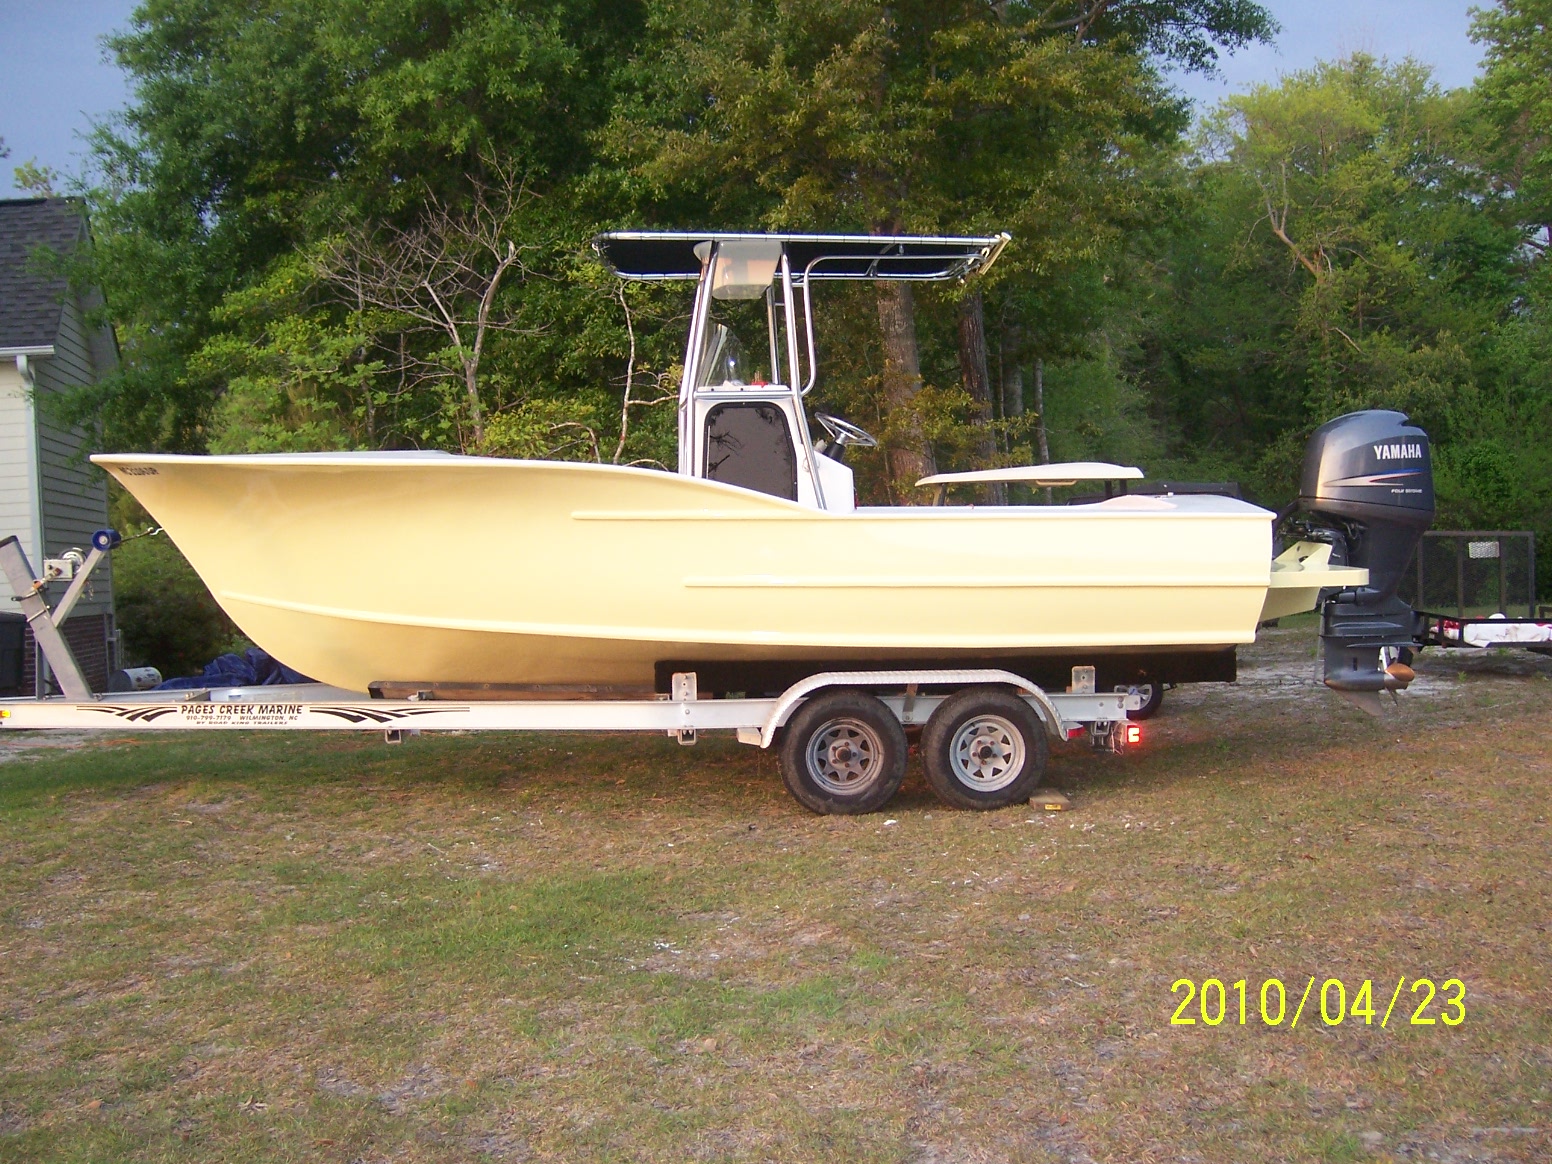
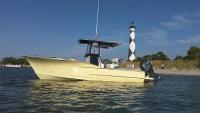
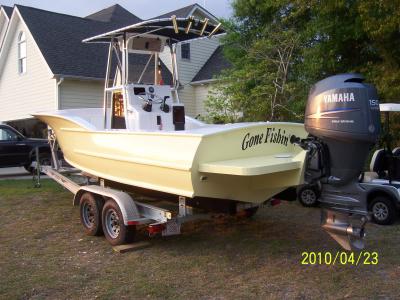
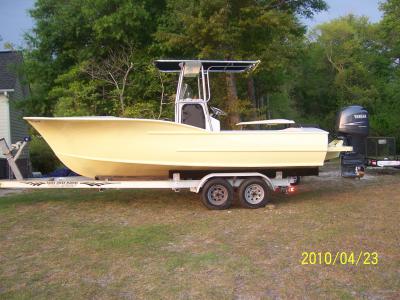
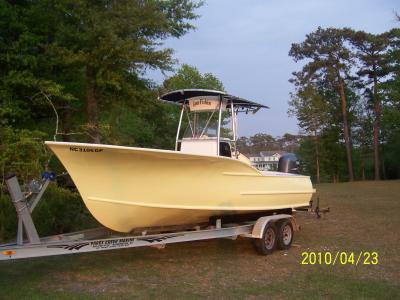
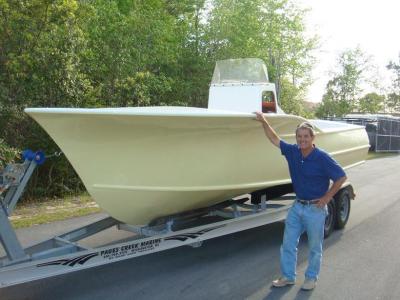
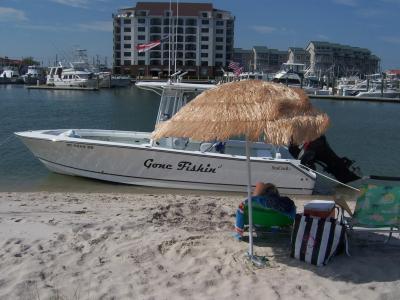
Thanks everyone. Pretty much done except for the nonskid. Will get it ready next week probably. Runs 43 mph wot. She came in at 2300 lbs, boat, console and bracket minus motor.
-
Thanks for all the great comments. My first boat and feeling pretty good with the results. Learned a lot. She floats!!!!!!


-
I'm pretty excited. Actually took it for a little ride today. Steering was a little soft so didn't go far. Bled it out about an hour ago. Still have some rigging to go.
-
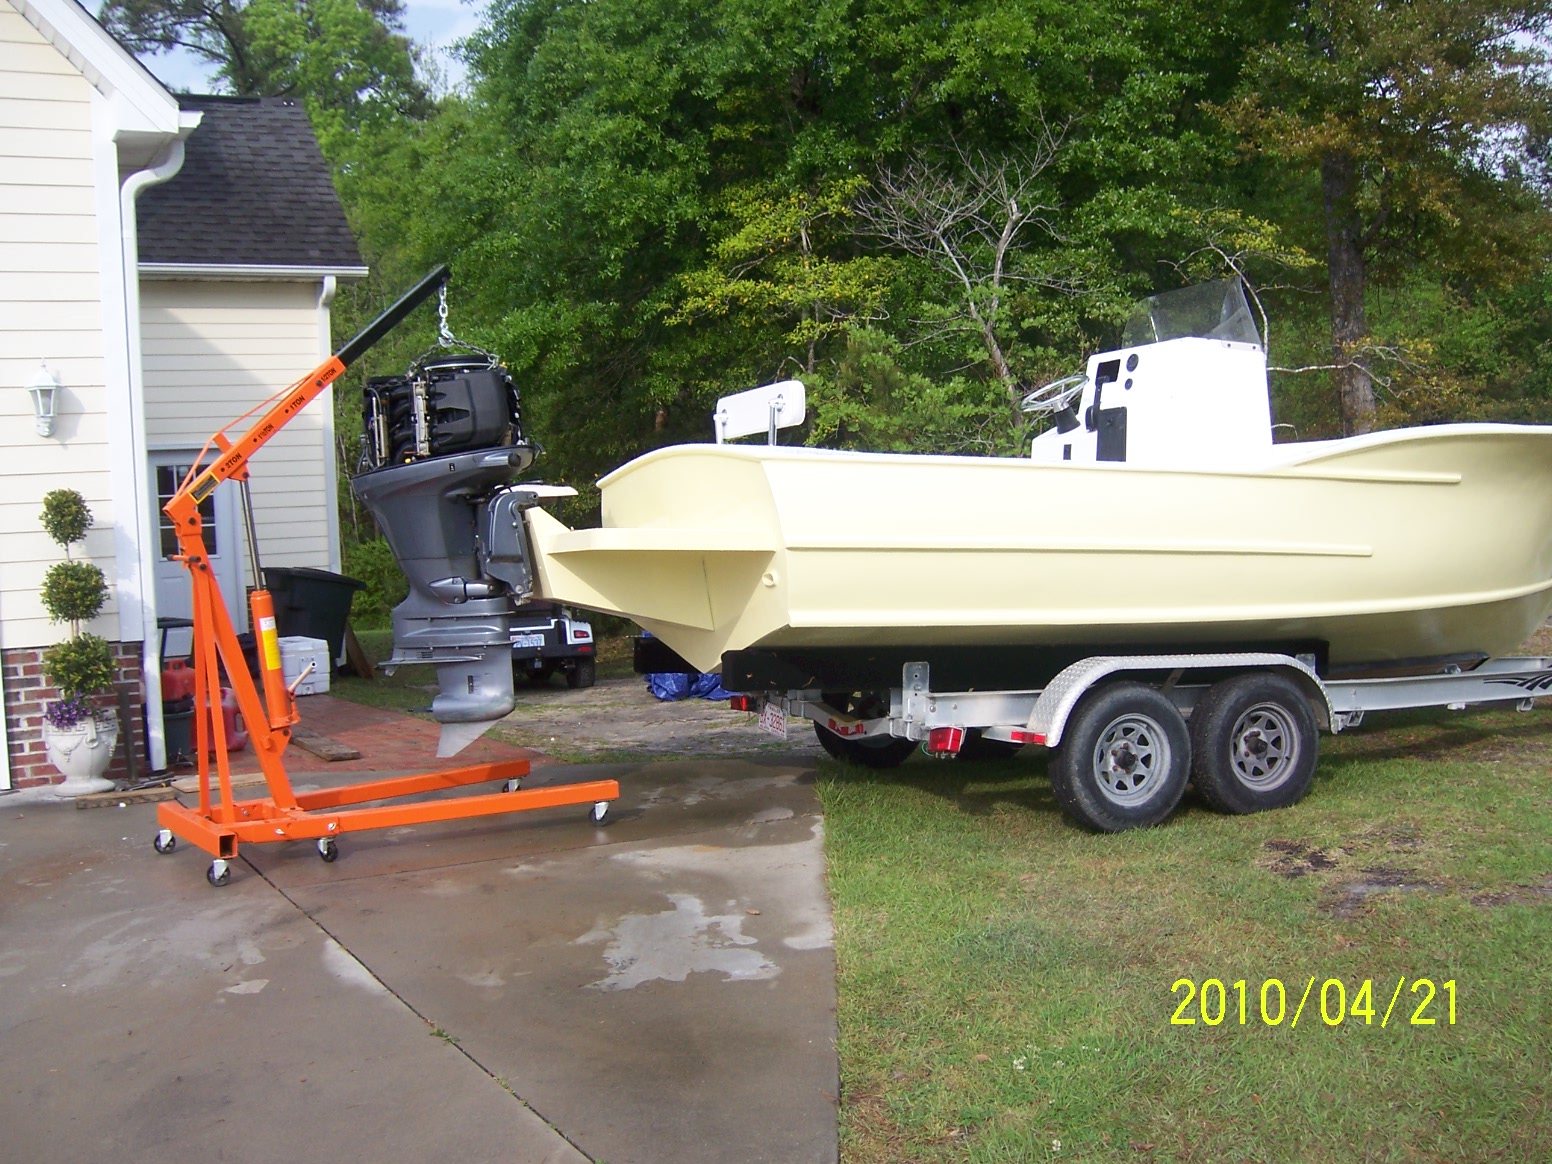
Got the motor hung, wiring harnesses pulled, rigging tube from the stern, wires pulled for the bilge pumps and trimtabs, hydraulic steering done except for the hoses, controls done. I'm making a list tonight so I can get organized. Harbor Freight lift $135 with coupon makes this so easy.

-
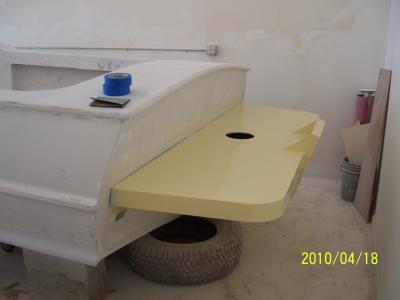
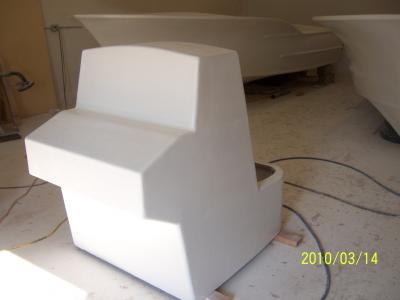
Inside painted and loaded on trailer headed home for rigging. Console is just sitting inside. It goes farther forward
-
Looking for new cushions for 2000 Whaler, Dauntless 16'
parrott replied to halffull's topic in Boating and Fishing Discussion
Check this site. They may have something http://www.boatseatsite.com/boatseats/boat-seat-cushions -
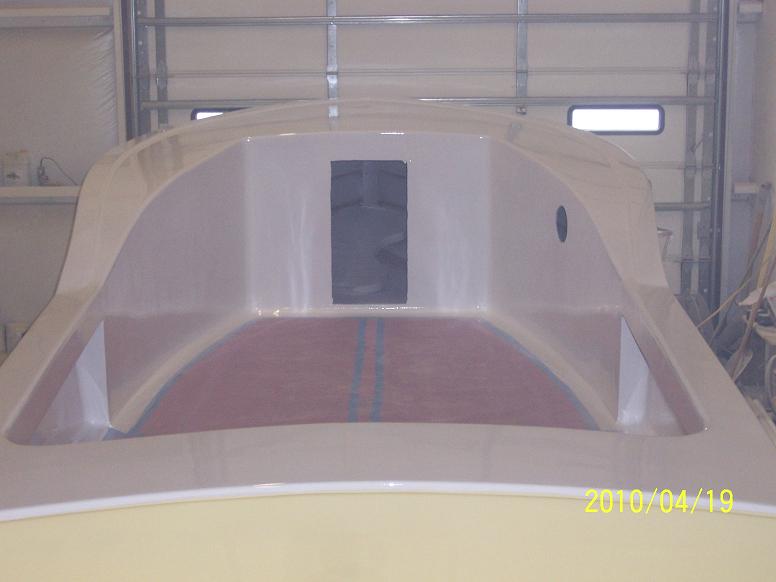
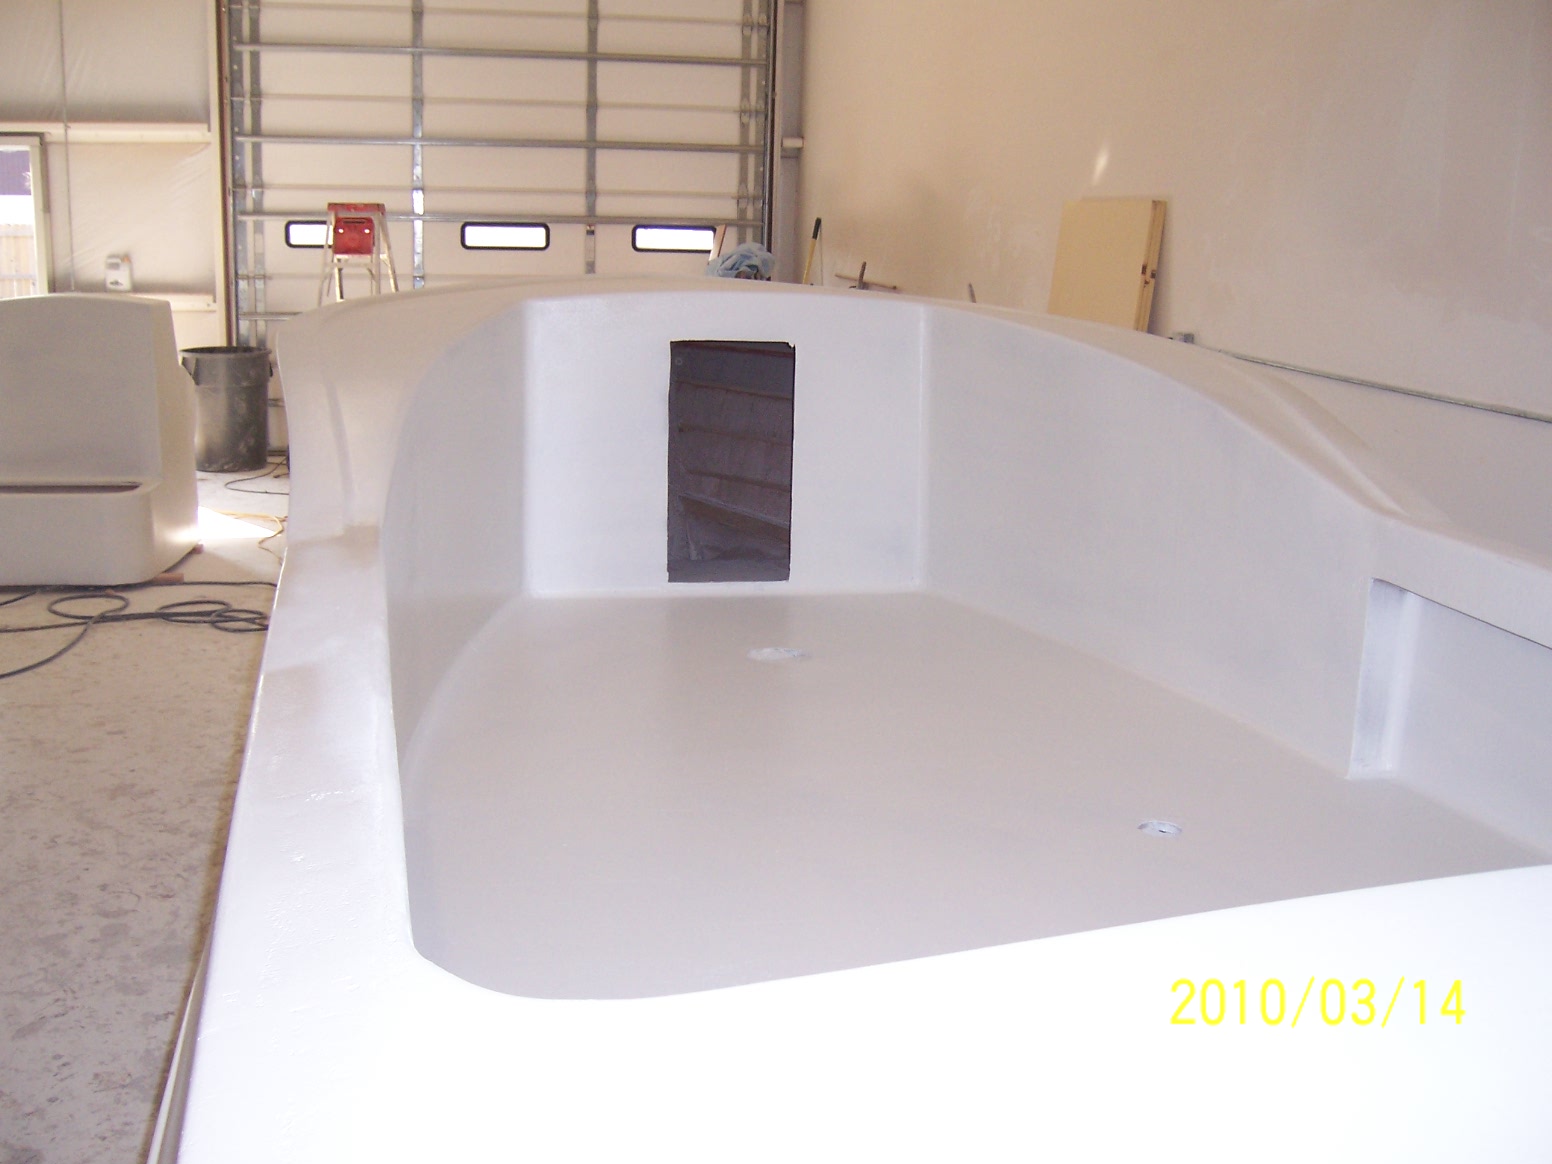
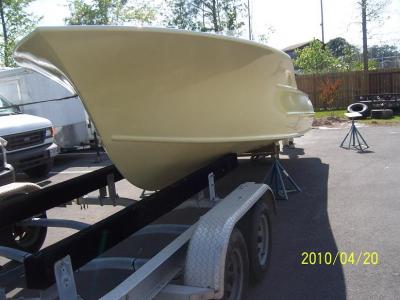
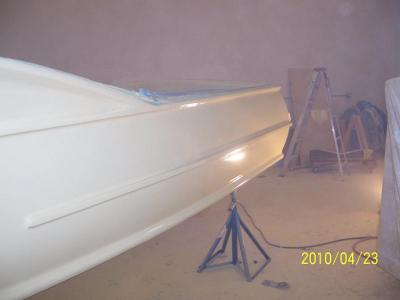
Got some better pics with the door up. Didn't want to raise it the other day because of dust. Painting the inside Monday

-
Suzuki 300 Check Engine Code 7-5
parrott replied to High Voltage's topic in Boating and Fishing Discussion
I got the same error a couple times on my 300. I was checking all my battery connections and cleaning the terminals. I was taking the negative cable loose and notice a krinkle feeling about 2' from the end. There was corrosion working it's way up the wire. My batteries were under the console so it was a long cable. Replaced the cable and no problems from then on. Did the code come on when you were cranking? Check all your connections even where the ground connects to the engine block. The computers are real sensitive to voltage. I just disconnected the battery cables to reset. There is also a white wire I believe that has to be connected directly to 12V constantly(it powers the computer) which can cause problems if it gets corroded. -
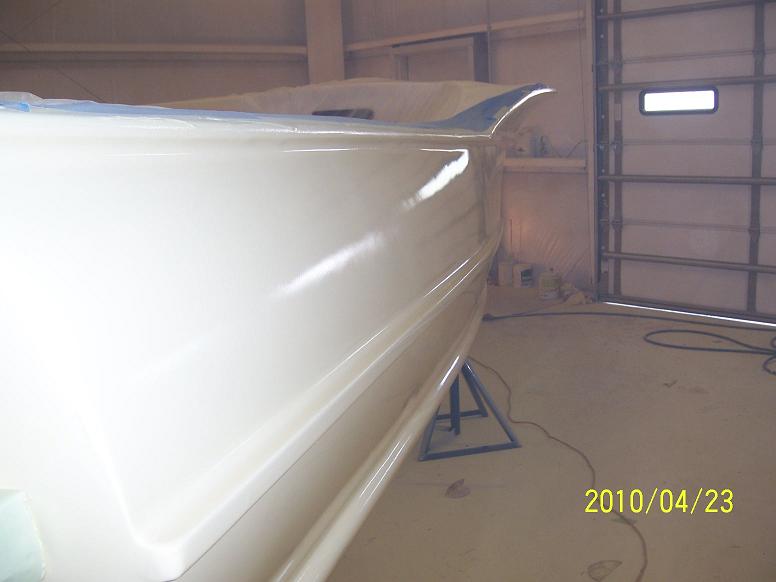
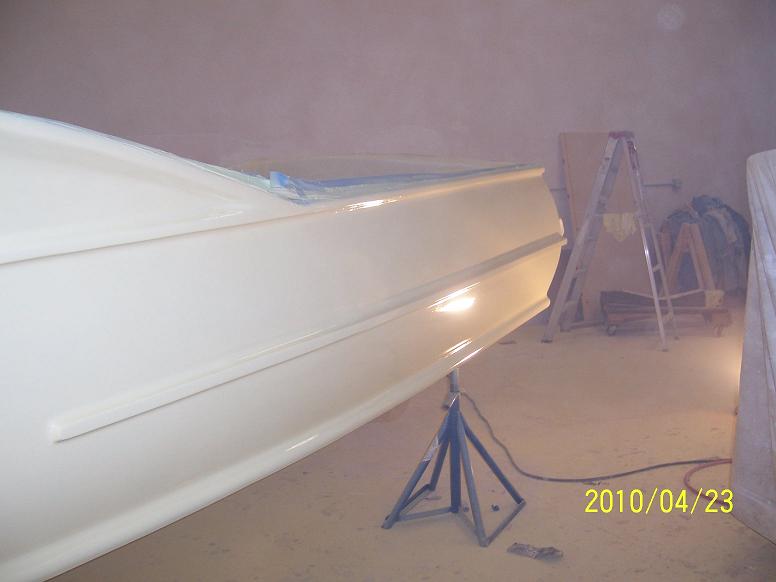
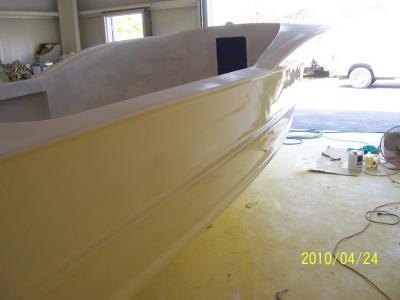
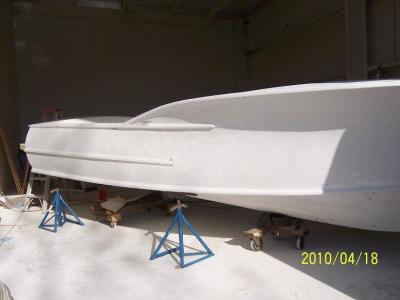
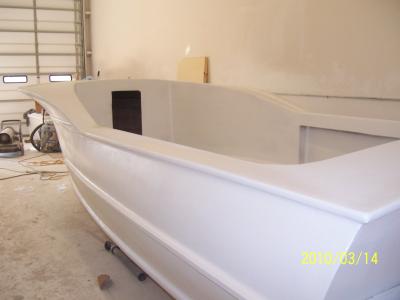
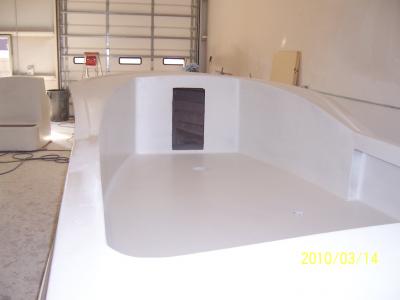
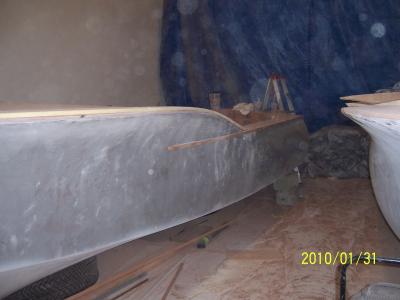
After sanding, priming and sanding for a month we got the outside of mine spayed this AM. Came out pretty good. It's Fighting Lady Yellow but the flash makes it look white.


-
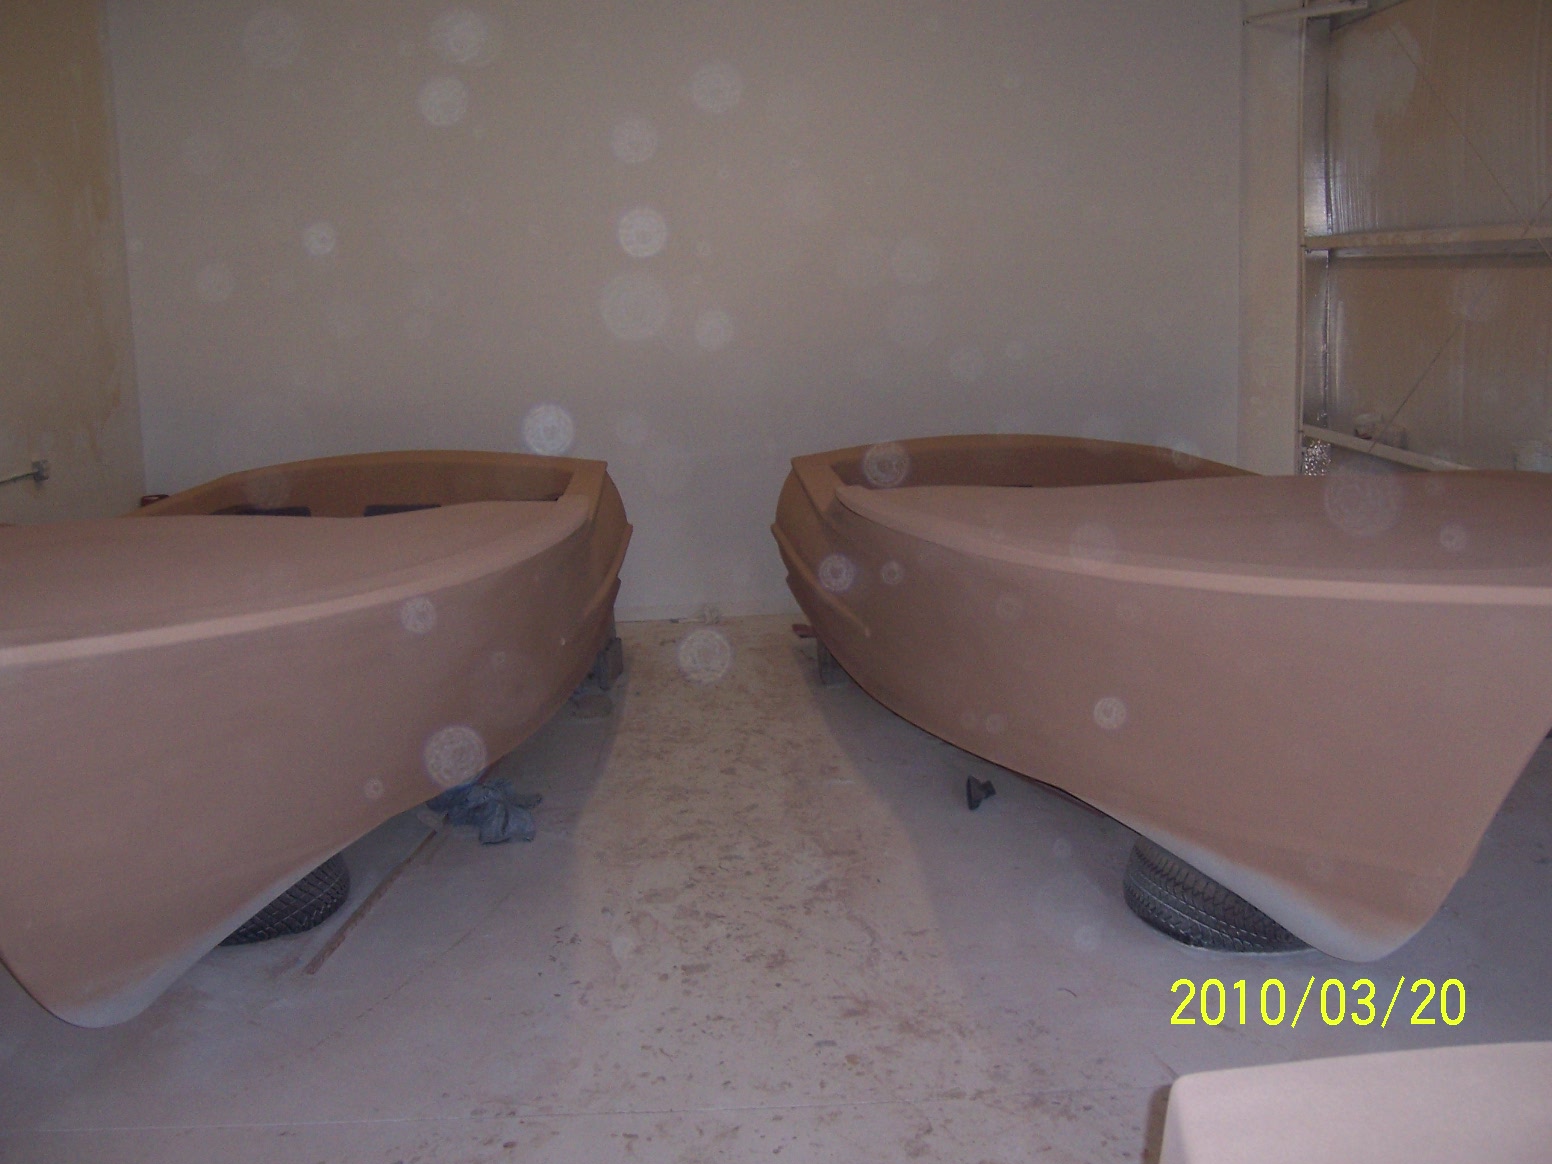
Yes, sanding,sanding, sanding Hope to get some final primer on this week Got the brackets primed. Looks like the same color as mine is going to be Fighting Lady Yellow.Made some dollies to move the boats around. Moved mine to the front to get ready to finish paint the outside.
-
Yes, sanding,sanding, sanding Hope to get some final primer on this week
-
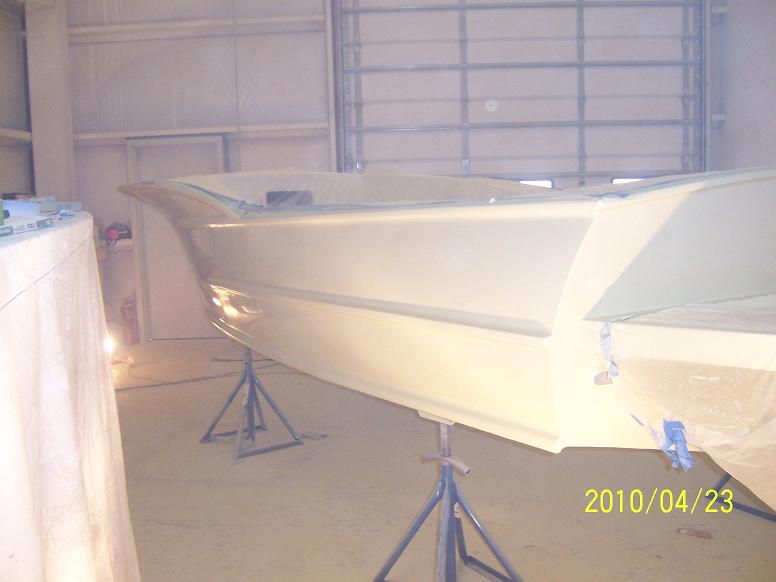
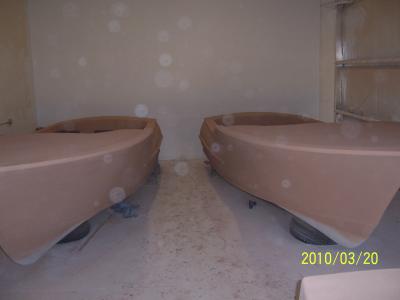
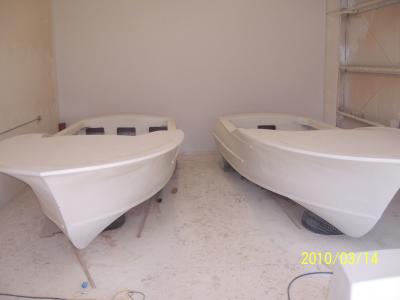
Got both boats spray faired inside and out. Got Jeff's console installed and started building the access hatches. More sanding, sanding, sanding...........
-
Winter Custom Yachts Build With Photos
parrott replied to Migration's topic in Boating and Fishing Discussion
That's beautiful. They do some great work. The dark blue one was up here in Spooners Creeksome this past summer. I have to get by there and see this is person. What's your expected splash date? If it's in Morehead please let me know. -
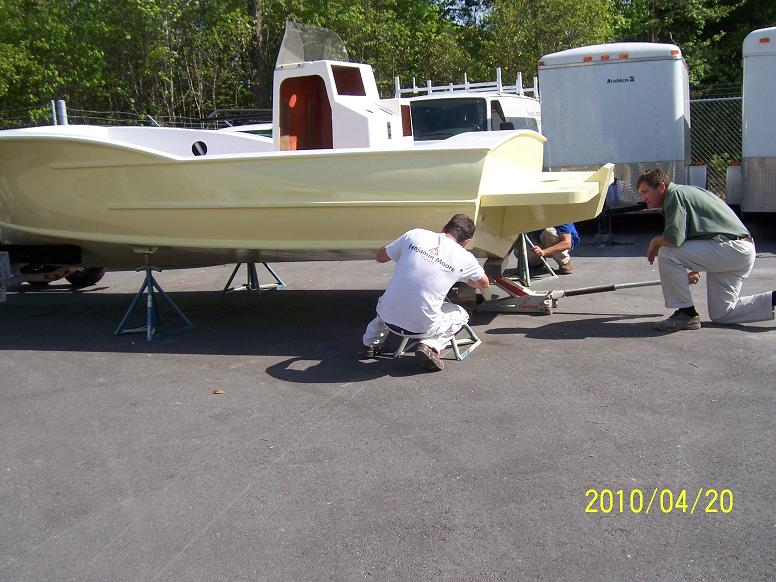
You can do it. Biggest thing you need is a place to do it. These jigs make this easy and you can make it as fancy as you like or just keep it simple. Got all the glass done and pulled the rounds inside both boats, now for some sanding, priming and fairing Got both boats sprayed with high build. Sanding, prepping for spray fair. Also got Jeff's console glassed and high build primed. Turned out good.
-
You can do it. Biggest thing you need is a place to do it. These jigs make this easy and you can make it as fancy as you like or just keep it simple. Got all the glass done and pulled the rounds inside both boats, now for some sanding, priming and fairing
-
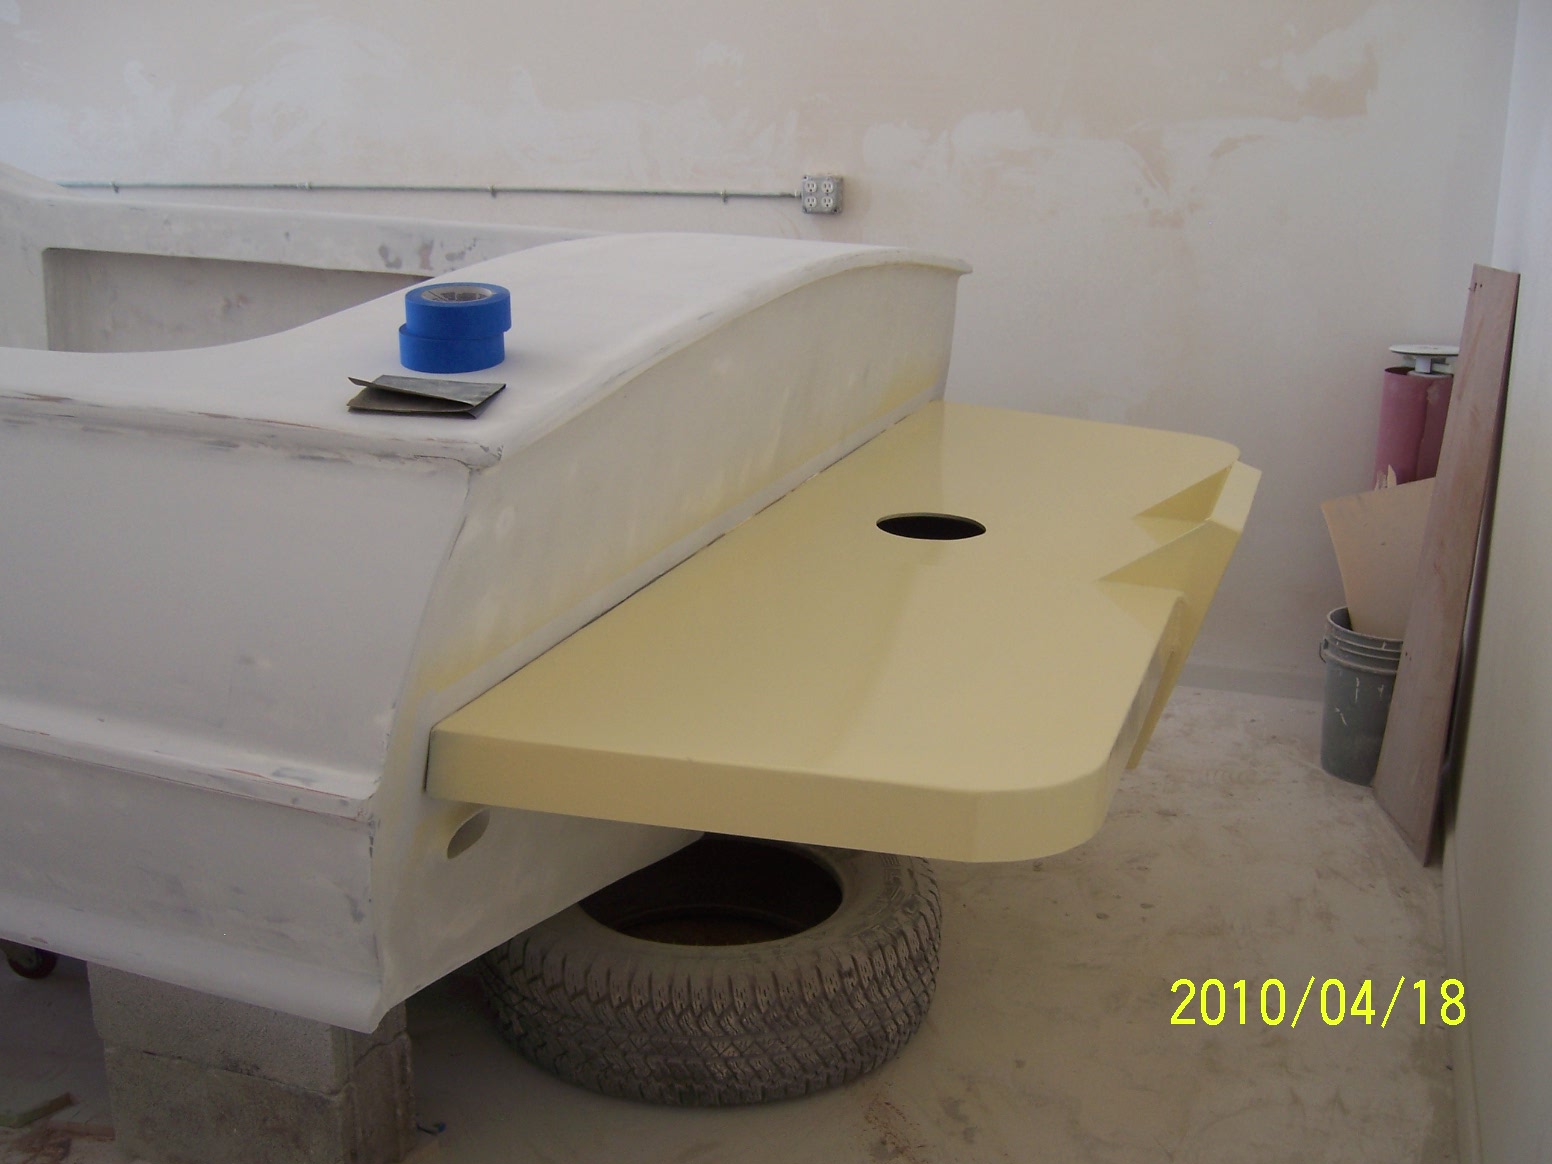
Will keep updates coming, but won't be a lot to show as we start glassing the deck and insides. Putting on the rubrails will start soon and make some improvements in the looks. Got some work done on the toeboard and rubrail

-
Will keep updates coming, but won't be a lot to show as we start glassing the deck and insides. Putting on the rubrails will start soon and make some improvements in the looks.
-
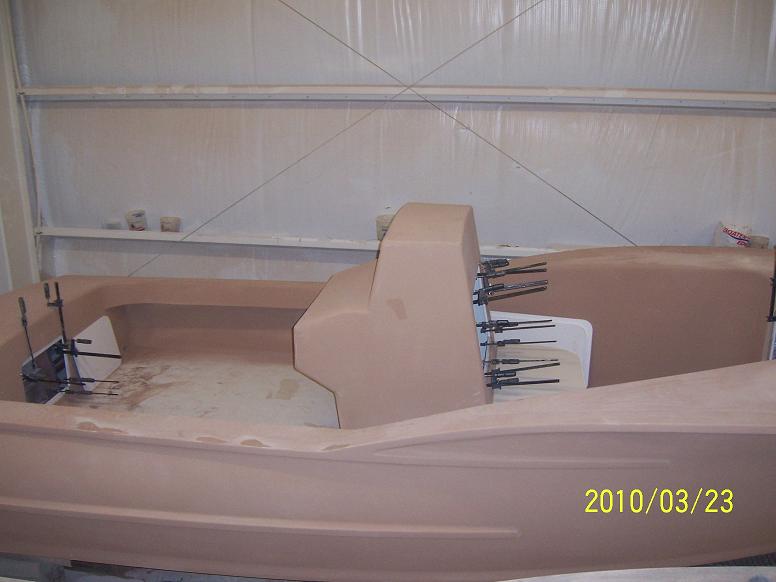
Hey Parrot, I'm in schooling right now for Naval Architecture, and I really appreciate the insight you've given during this build. I hope to one day design and build my own line of boats, and your pictures are really helping me to visualize my design. Where are you located? I'd love to see if I could come take a look at your shop and current progress one weekend. I live in Morehead City NC. We are building the boats in my friends shop in Havelock. You are welcome to come by anytime. Got some time to install the brackets Saturday. Will be working on bumper rails for the gunnels and tumblehome and splashrails.

-
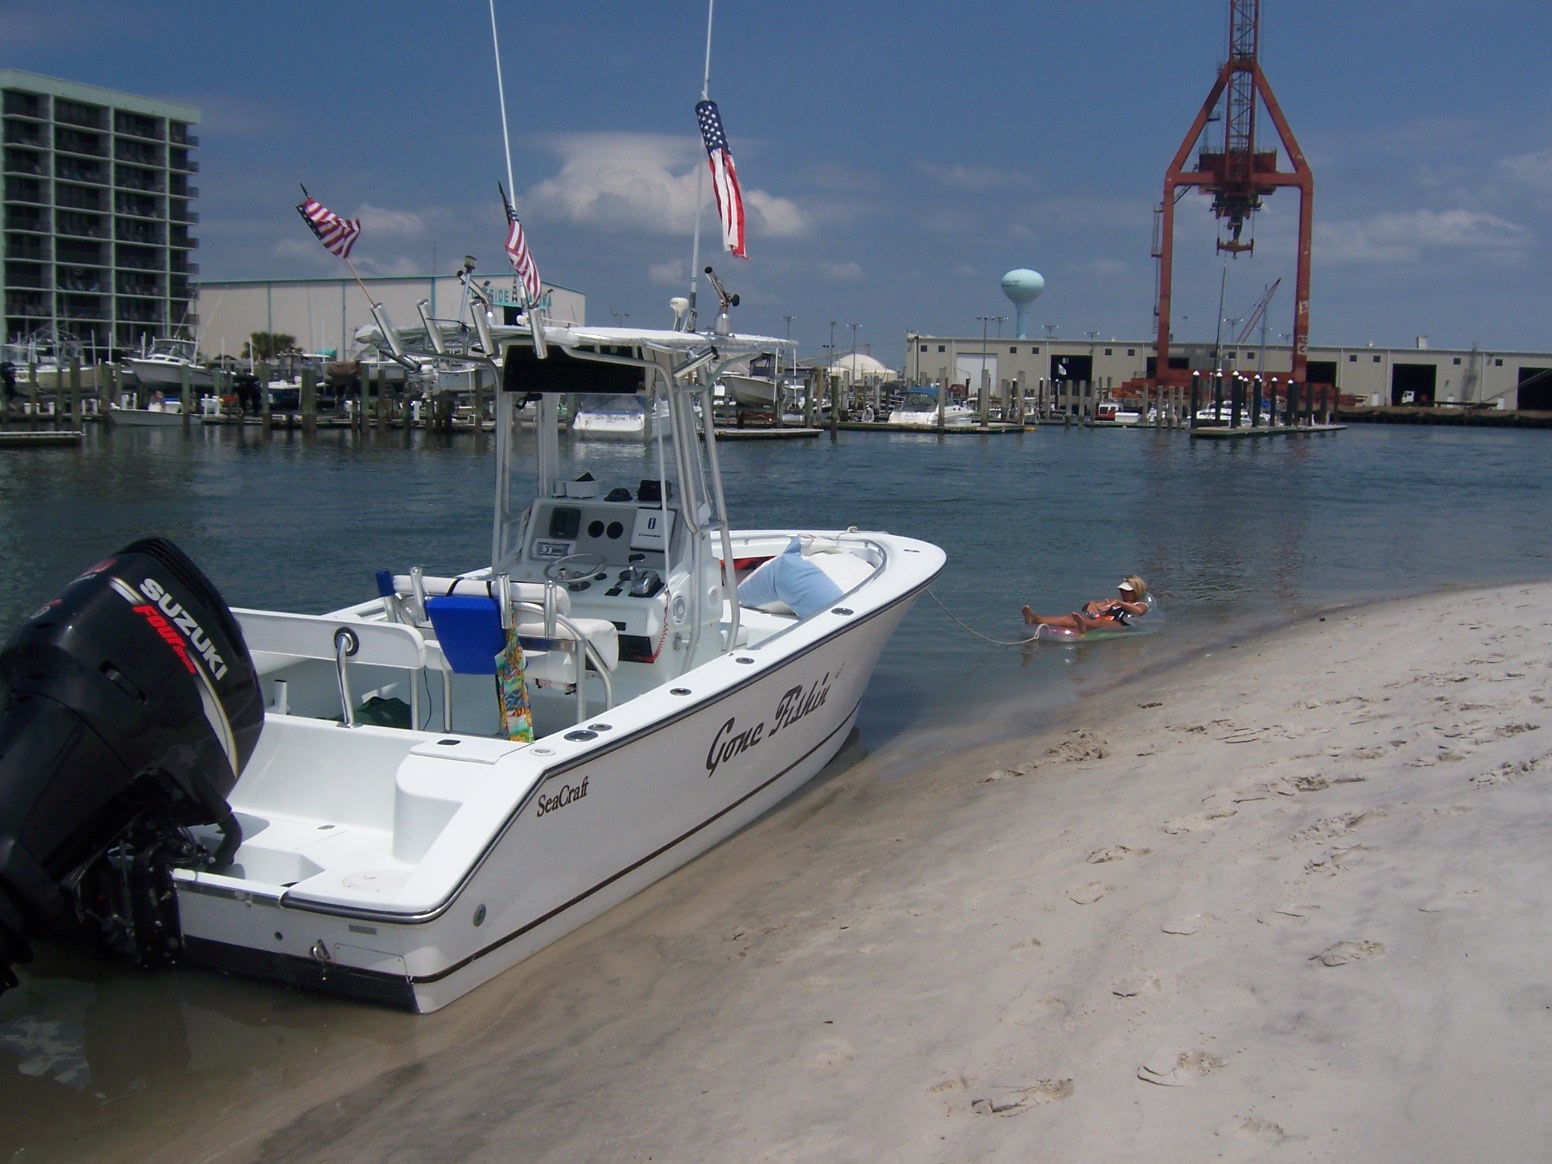
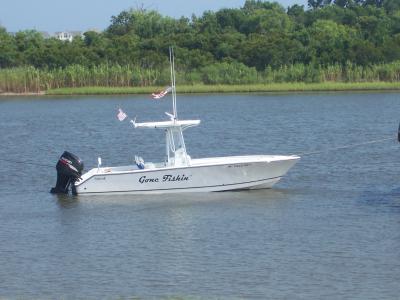
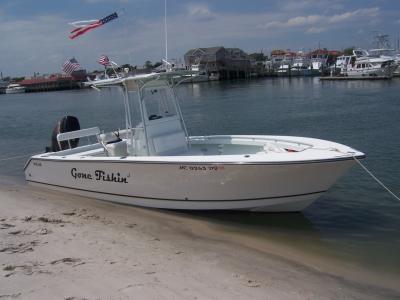
2000 25' Seacraft 2008 300 Suzuki 290 hours Correction, it's 228 hours 2005 Dual axle Galv. Trailer Garmin 498C Icom VHF 3 Batteries w/switches 6 speakers with amp Dual Battery charger onboard Taco Outrigger bases with practically new outriggers Flip down rear seat with removable back rest Bennett Trim Tabs EZ2CY 3 piece with Stratoglass wings ($1800) It's the best Has bottom paint but is kept on a lift since motor was new. I removed the bottom from the sides to keep the beautiful lines of the Seacraft visible. Warranty until 2/22/2014 I removed the Furuno and stereo and replaced the starboard with just the Garmin. No BS price of 28K or Consider partial trade for Carolina Skiff They don't get much "purdier" than this!!!!! Will have my winter boat build project ready by spring and don't need 2 big boats. Donnie 252 876 8589

-
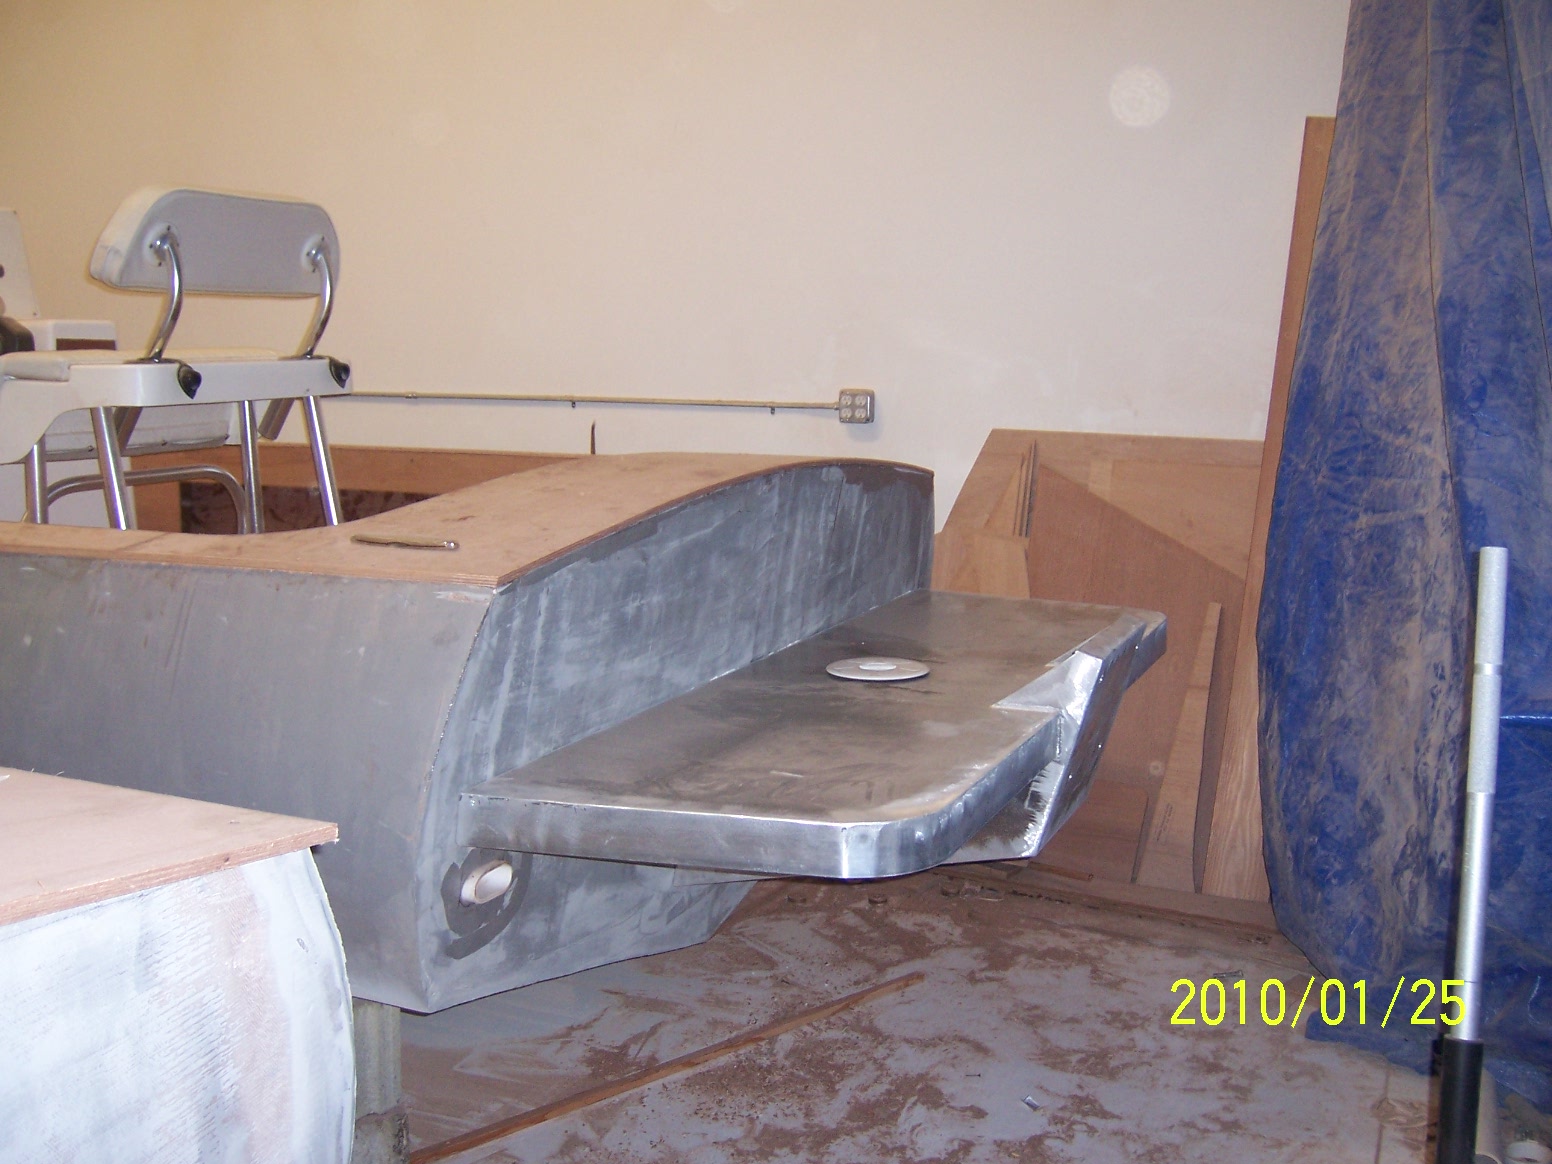
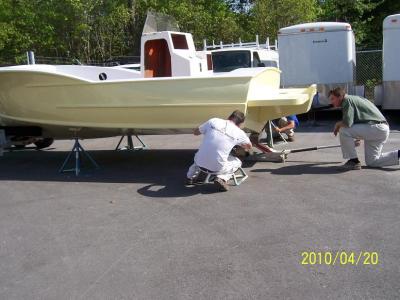
150 Yamaha 4 stroke mounted on a D&D Marine bracket. Not sure on the weight but we are told lighter than a fiberglass of the same size. We will weigh them when finished.
-
We ground down the 3/4 plywood under the scuppers so the inside bottom of the scupper is flush with the top of the plywood and we are also adding a layer of glass to the plywood floor so draining shouldn't be a problem. We will be installing the brackets tomorrow.
-
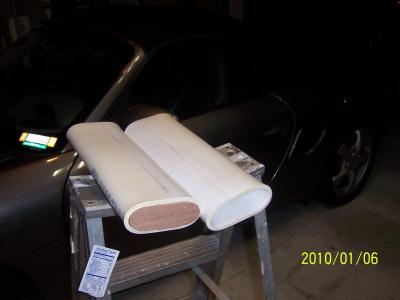
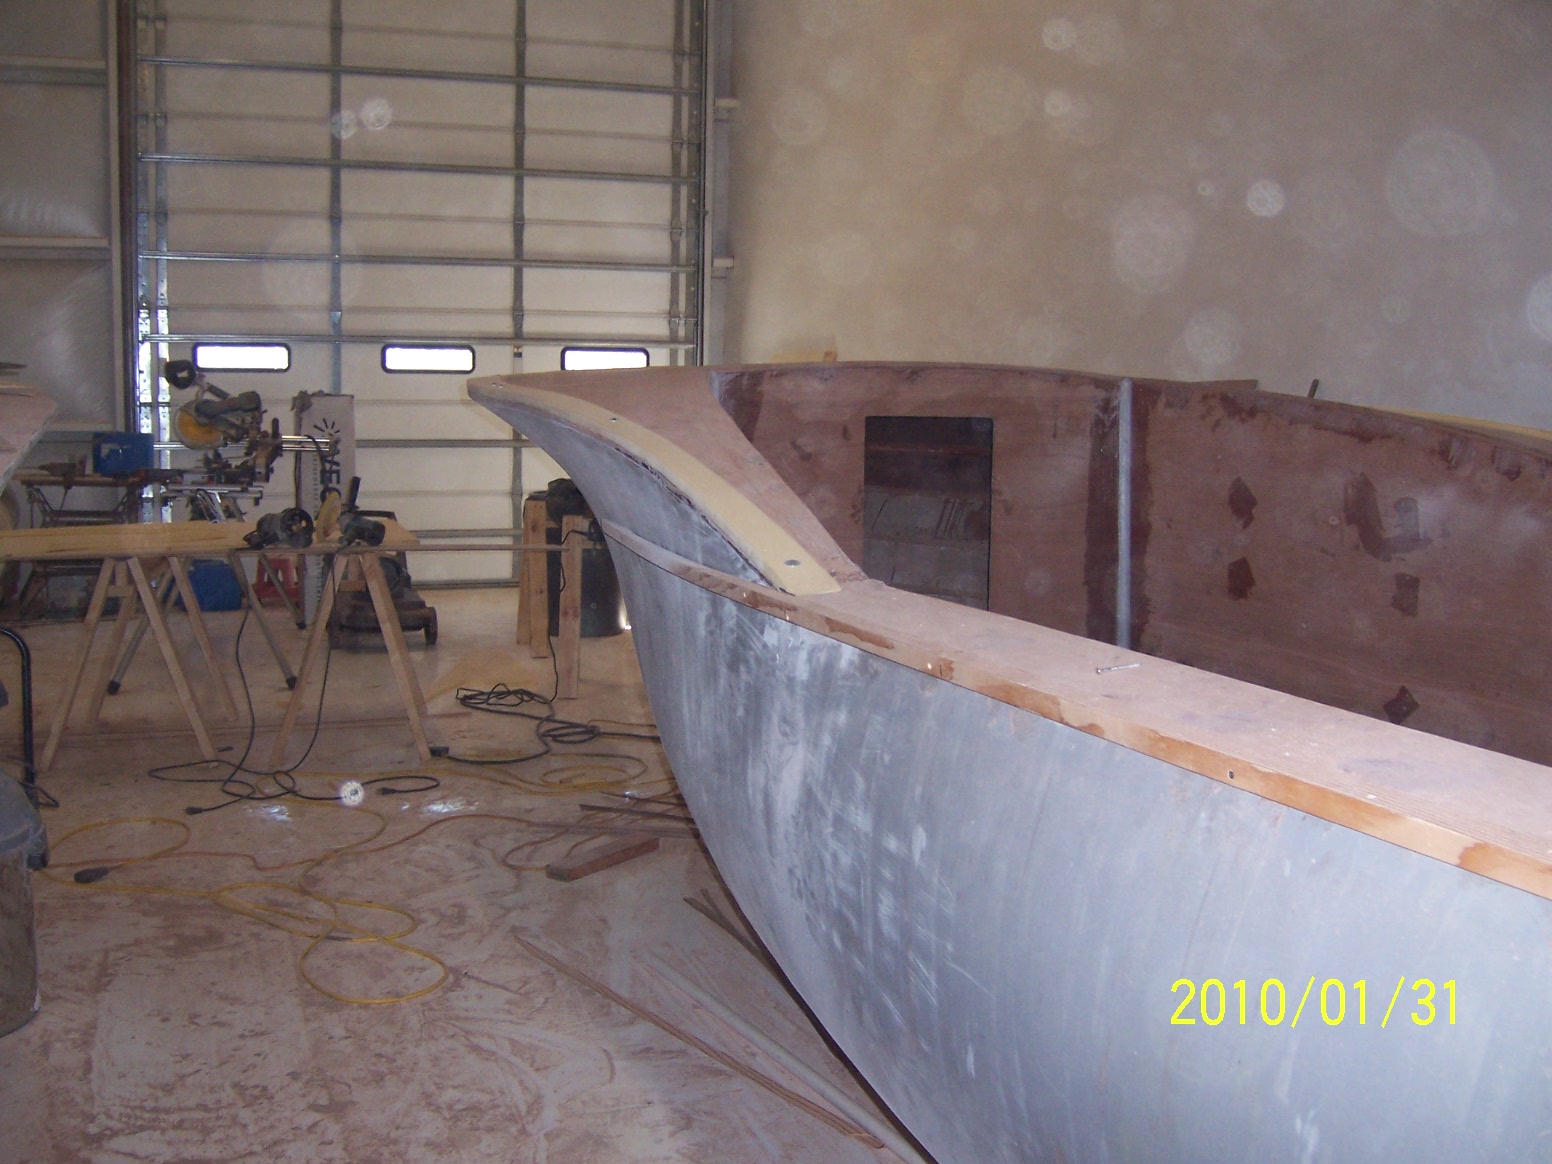
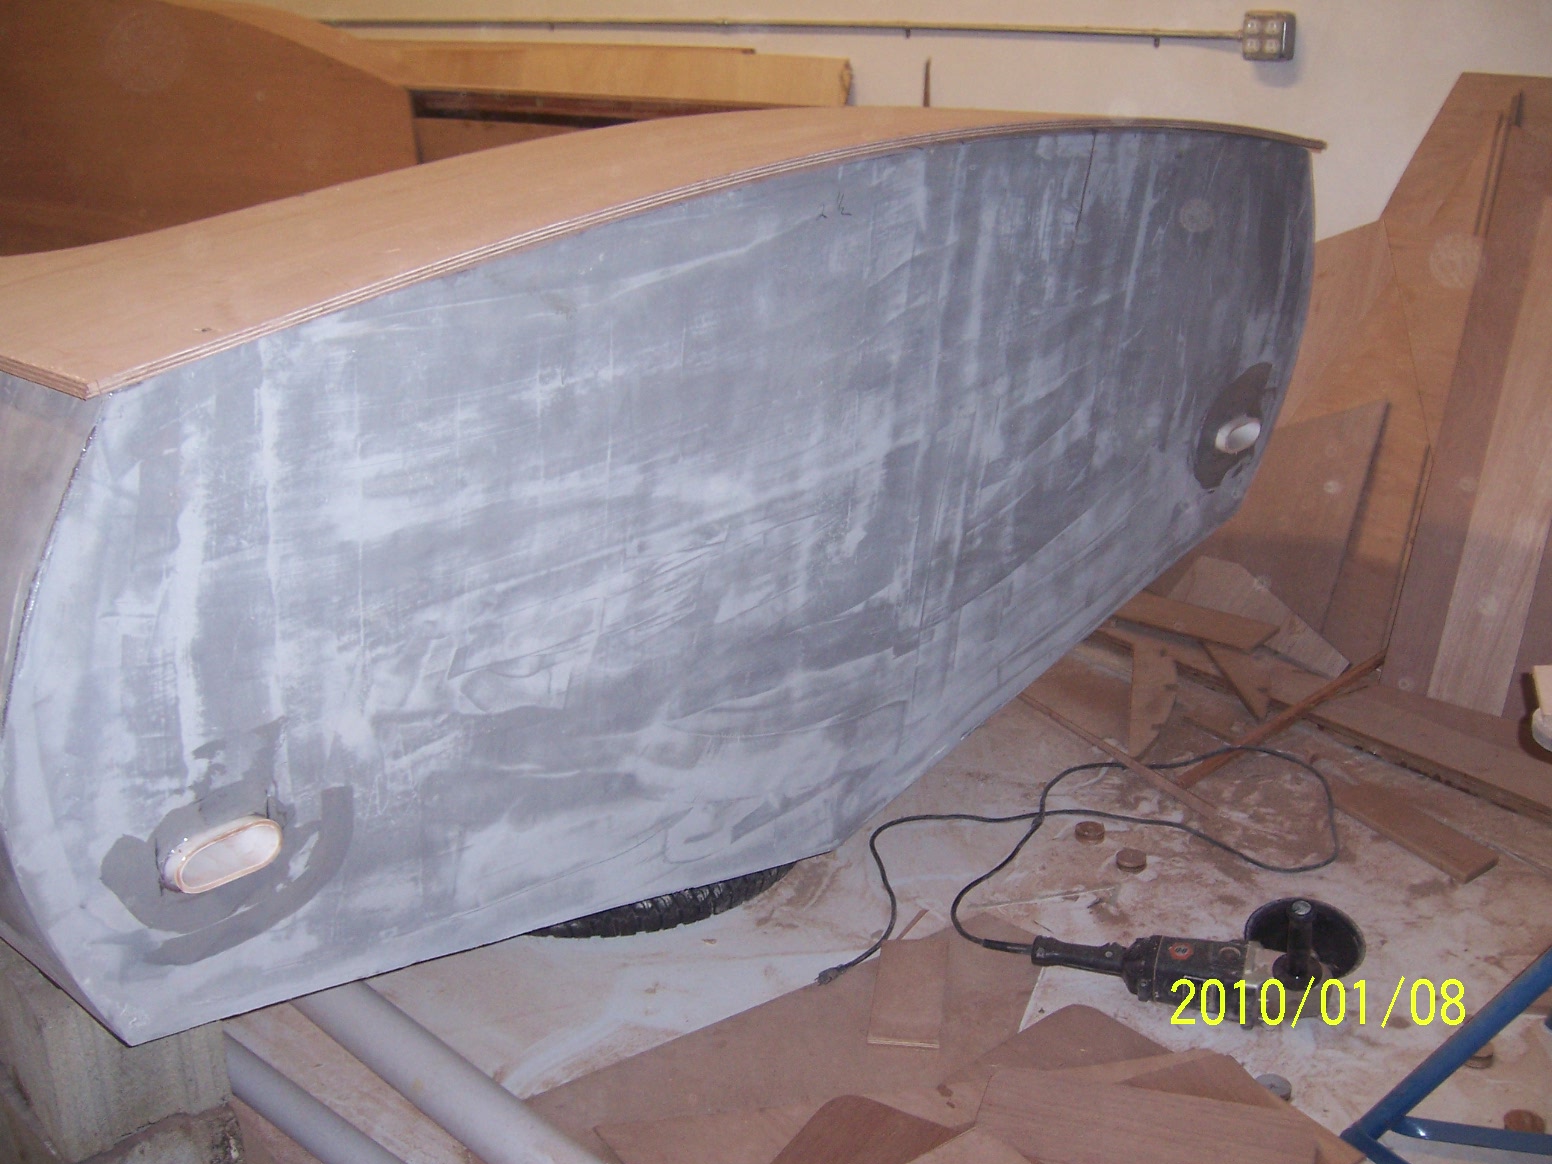
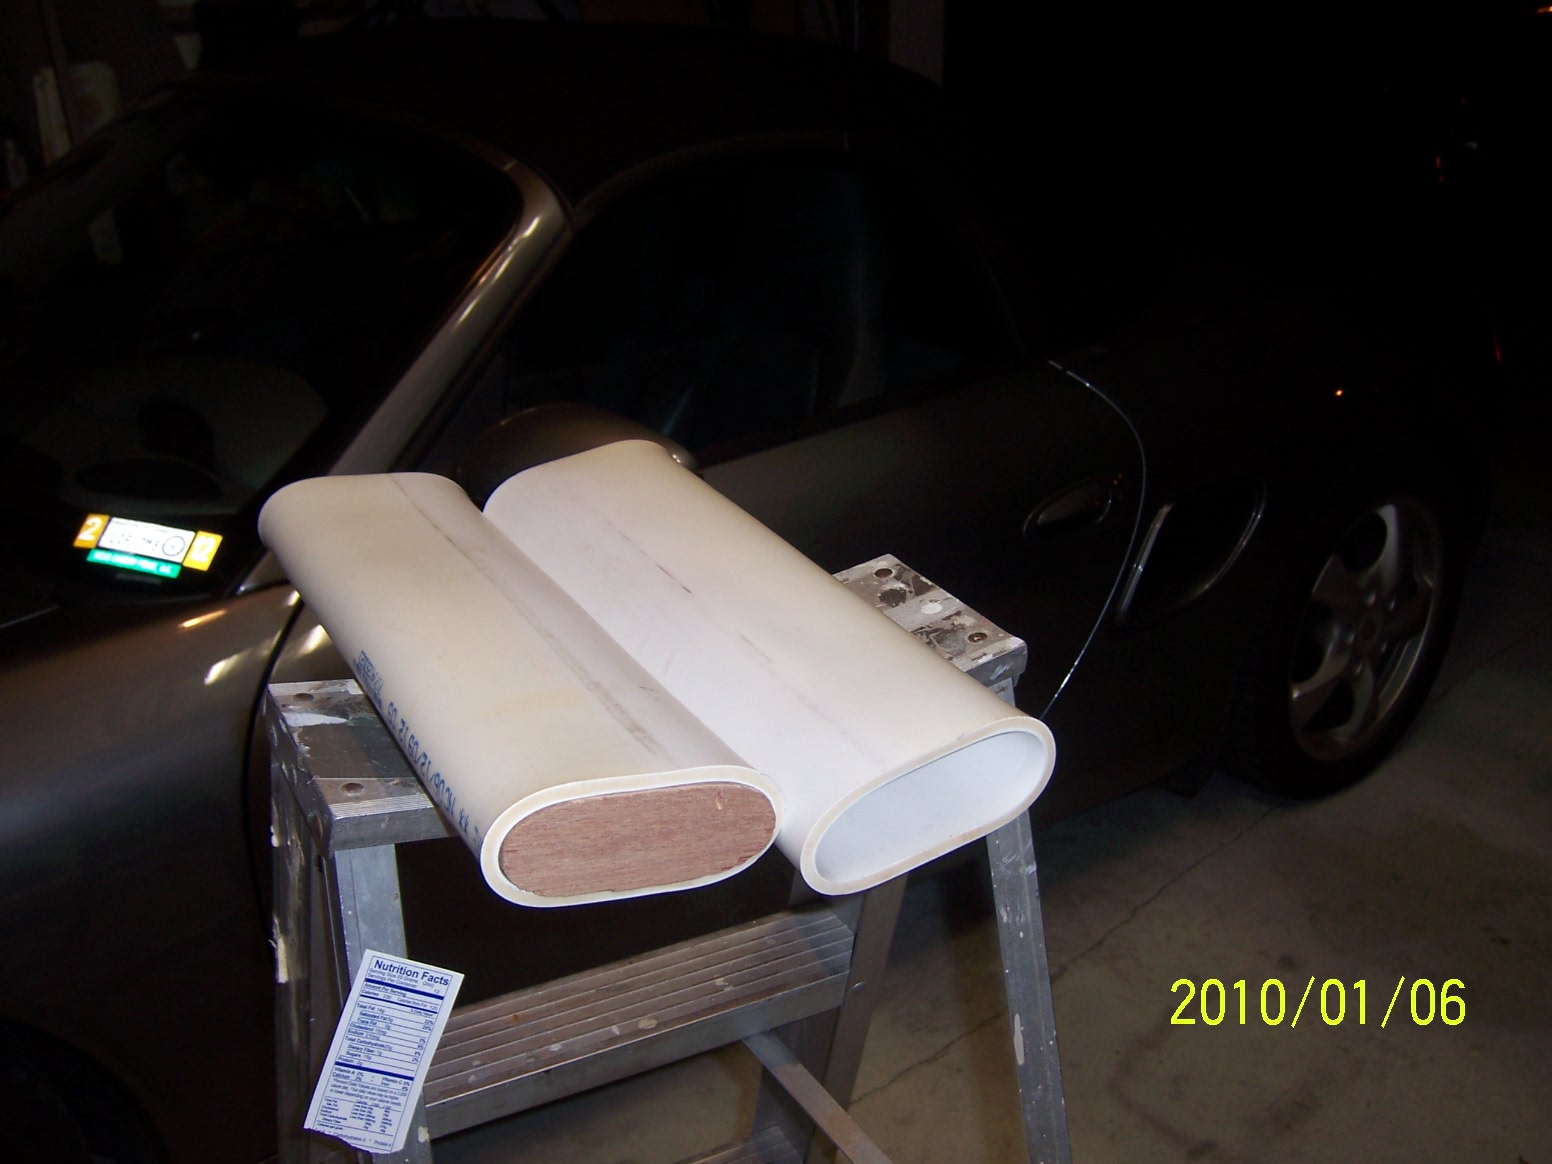
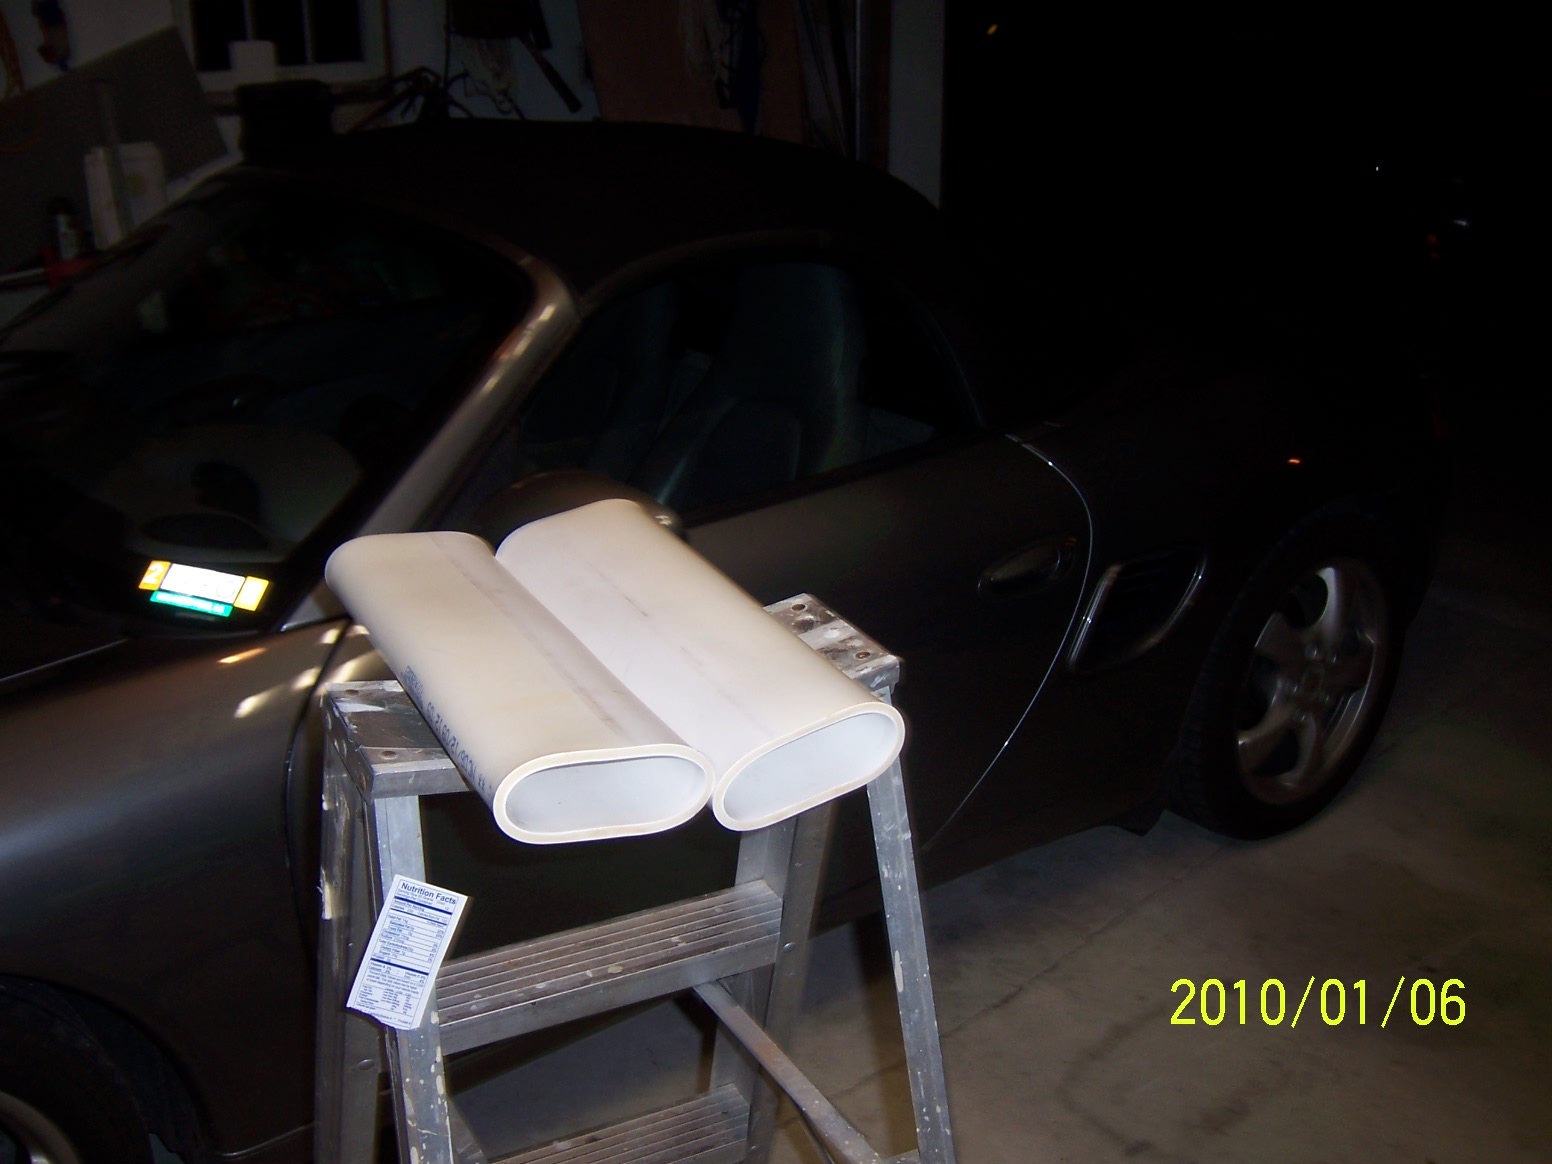
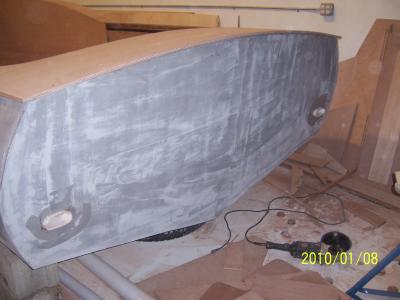
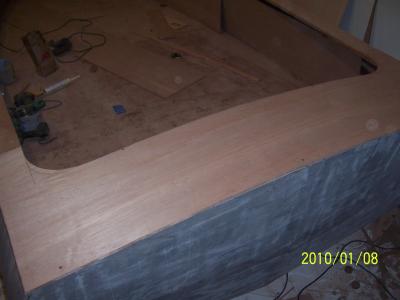
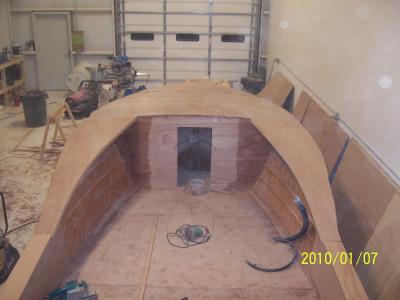
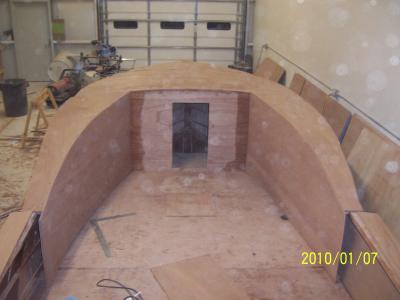
Now that the holidays are over, we hope to get some serious time in. Probably a couple more months after work and weekends. Had some time to figure out my scupper tubes as my transom area is 12" thick where my rear bulkhead is. I cut some 3" PVC pipe 14" long, bake in the oven at 350 for 4 minutes and formed my tubes using a plywood form in each end to hold shape until they cooled. Got some time to fit the gunnels. Got a little work done on the transom. Scuppers installed. Will cut flush with the transom when epoxy cures.
-
Now that the holidays are over, we hope to get some serious time in. Probably a couple more months after work and weekends. Had some time to figure out my scupper tubes as my transom area is 12" thick where my rear bulkhead is. I cut some 3" PVC pipe 14" long, bake in the oven at 350 for 4 minutes and formed my tubes using a plywood form in each end to hold shape until they cooled. Got some time to fit the gunnels.
-
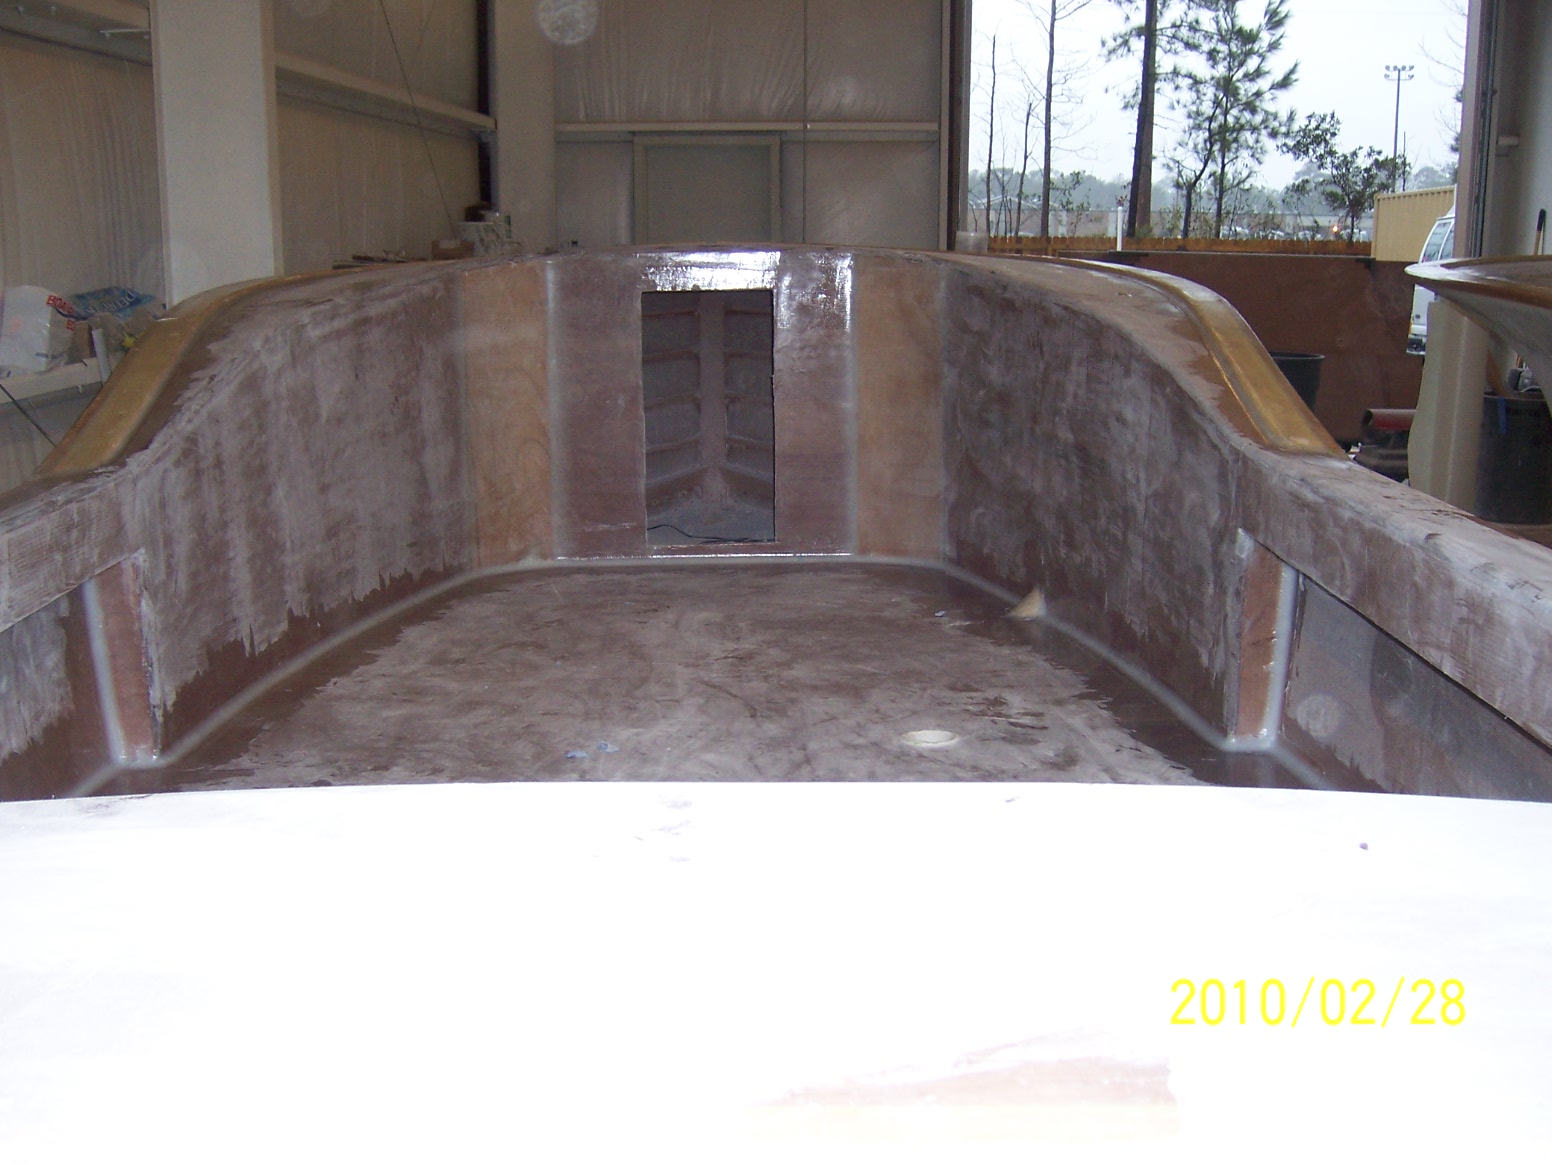
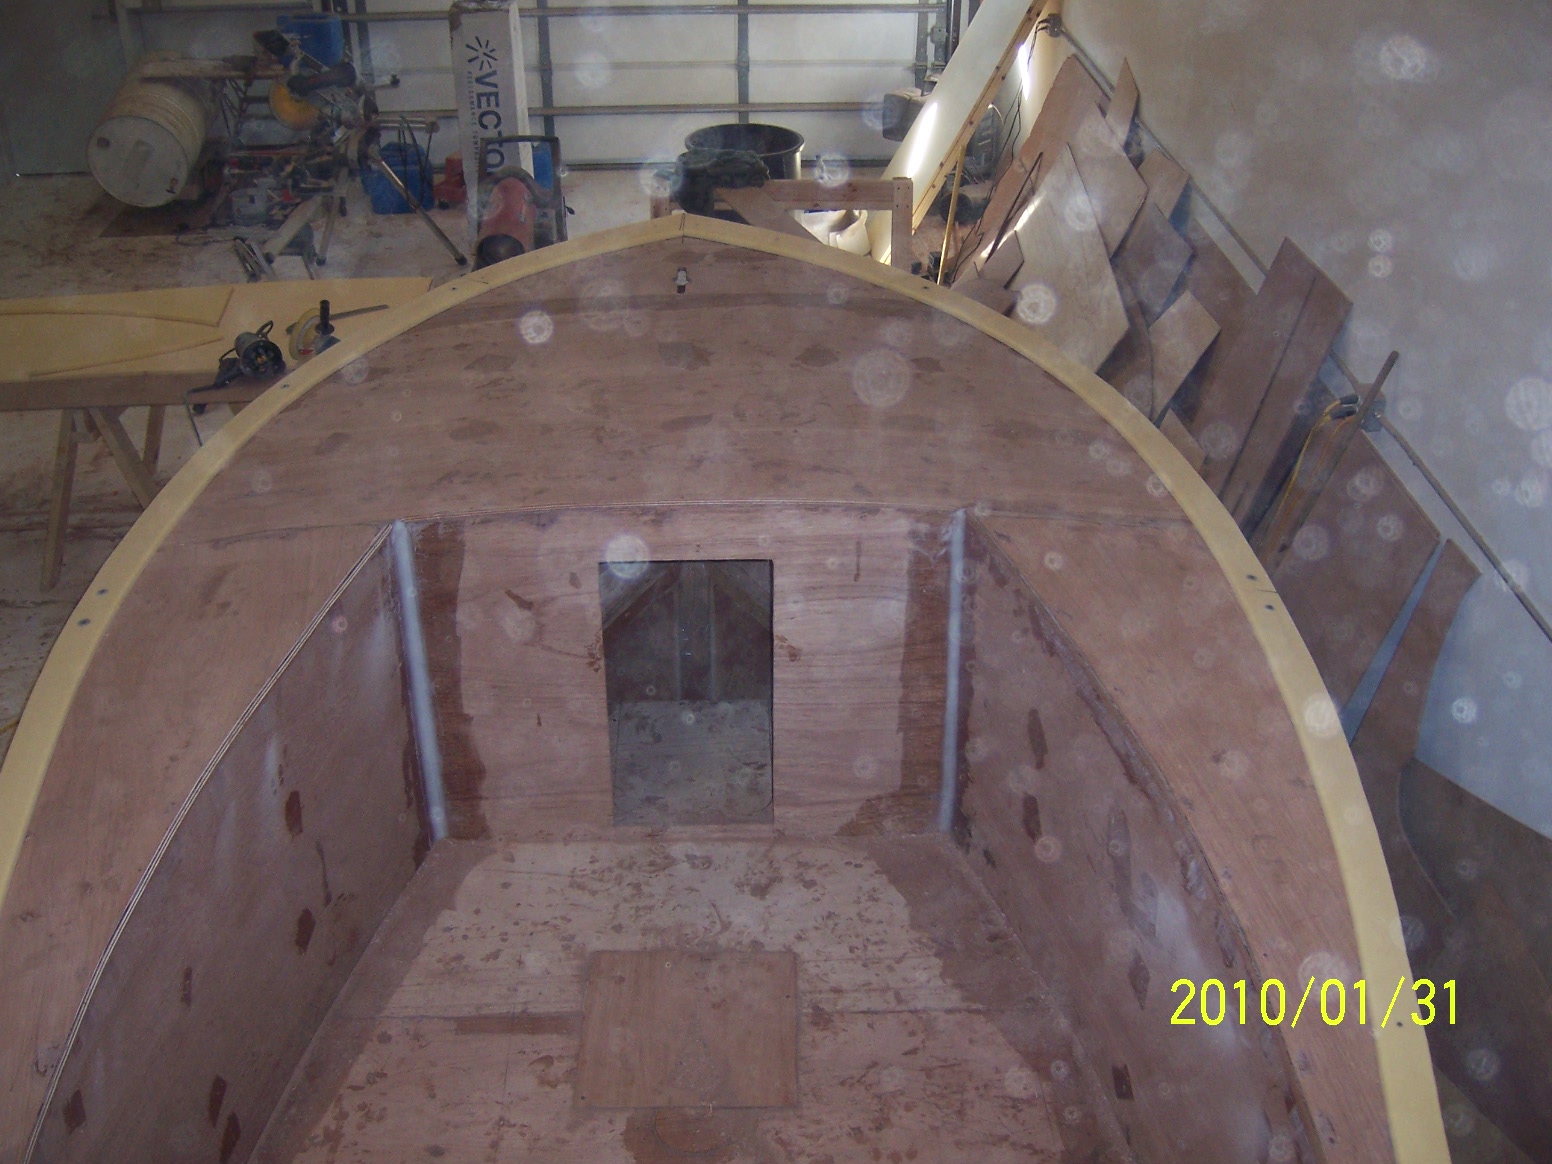
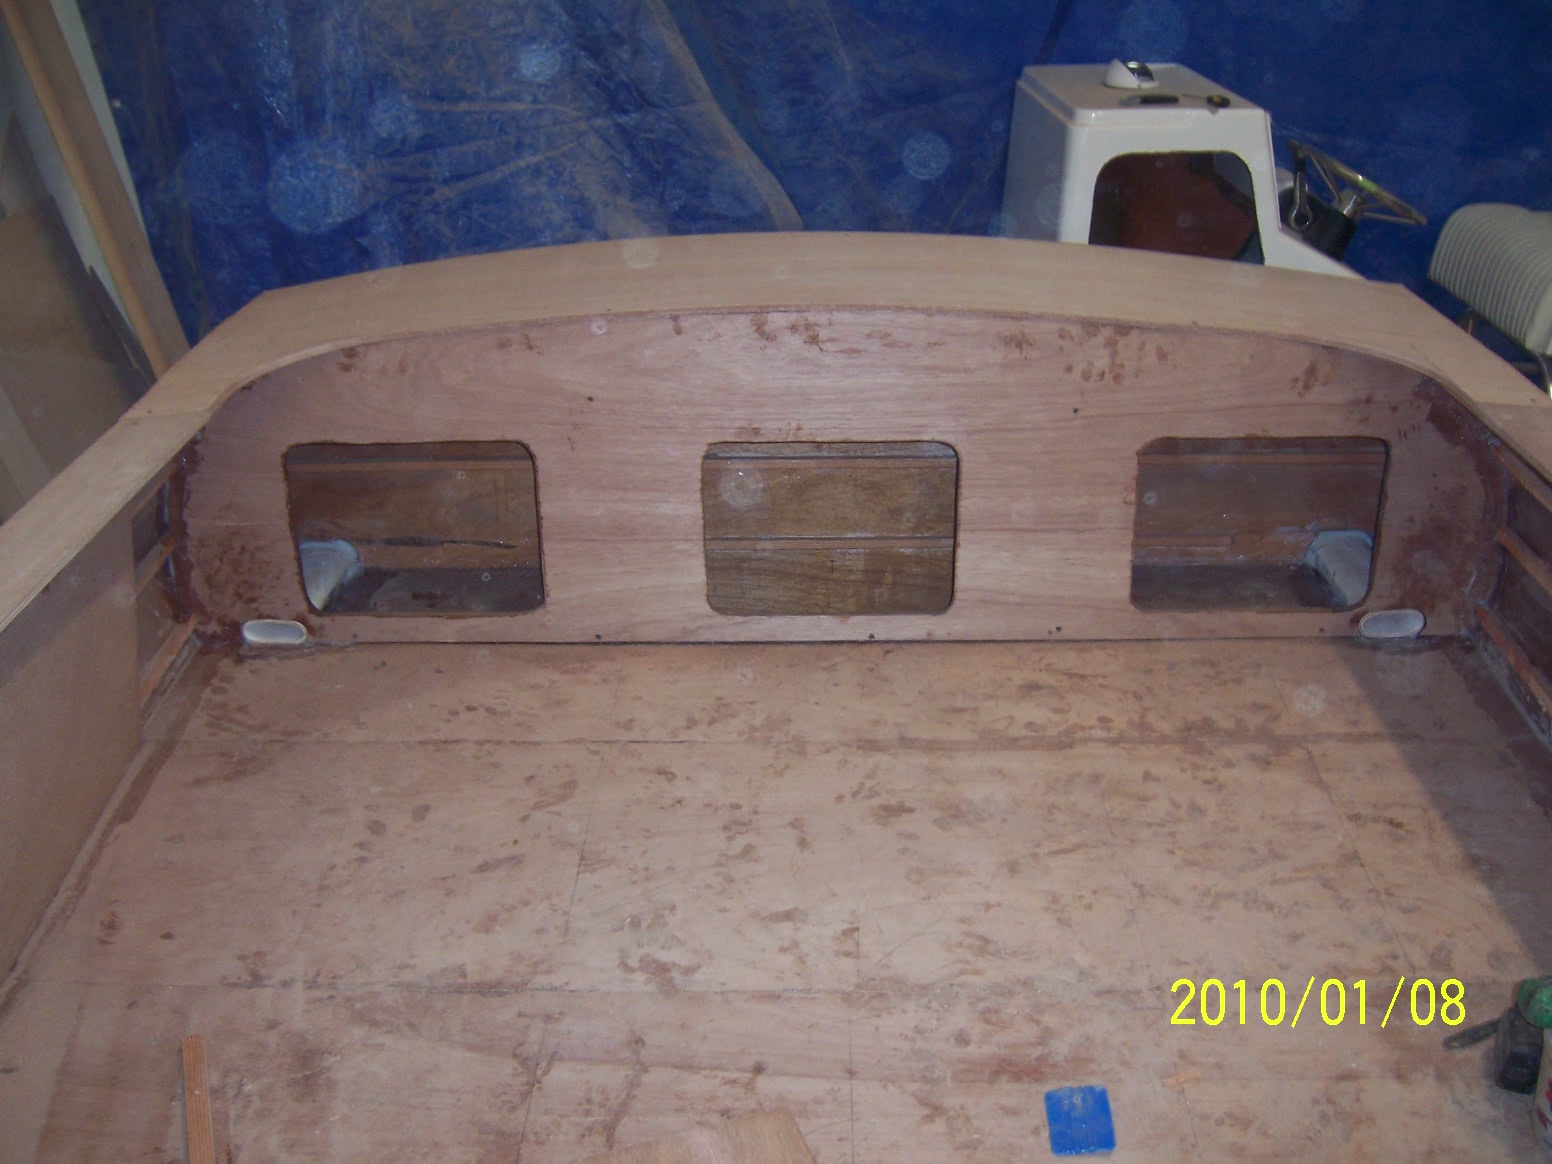
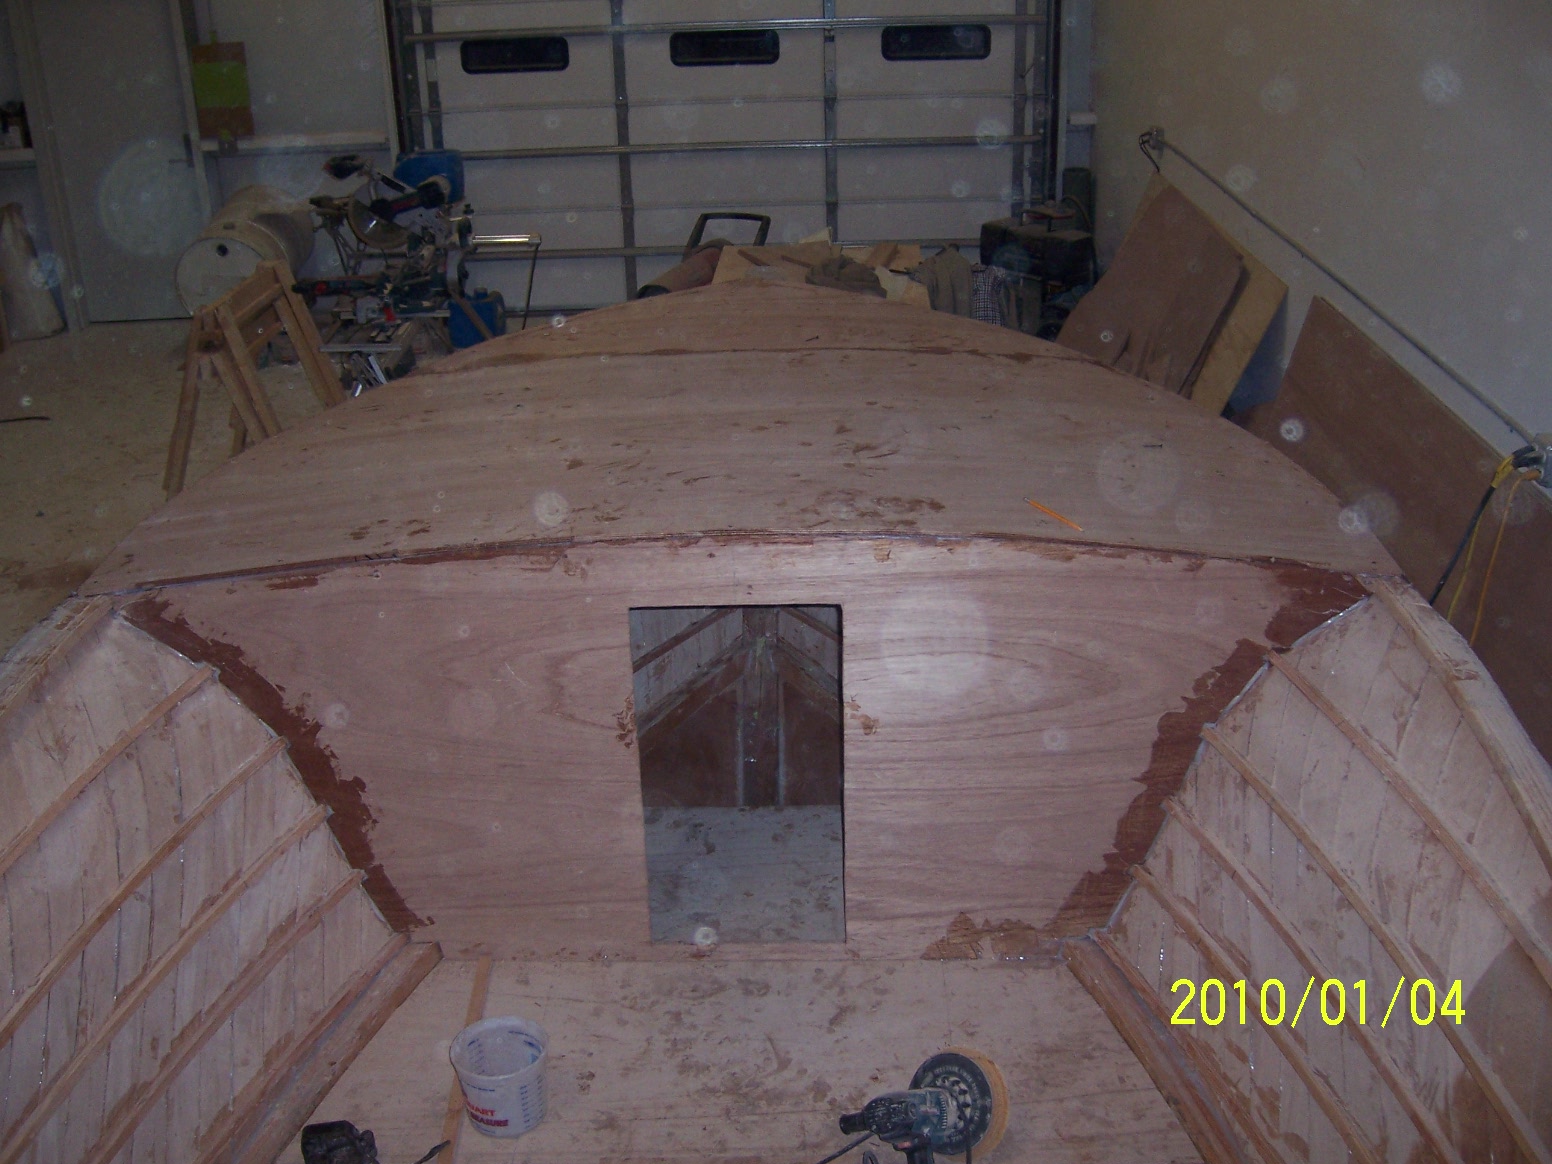
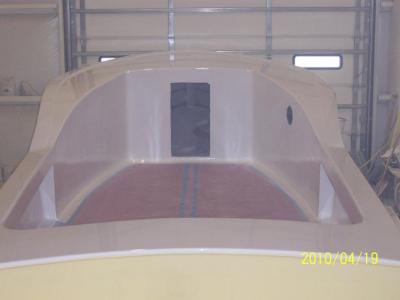
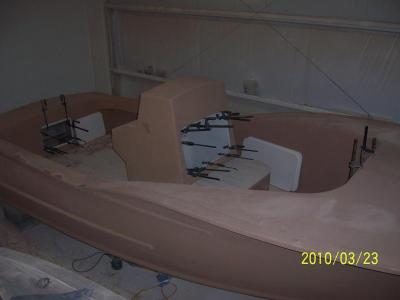
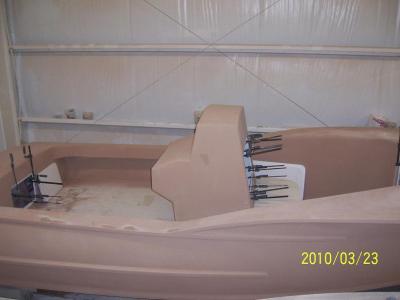
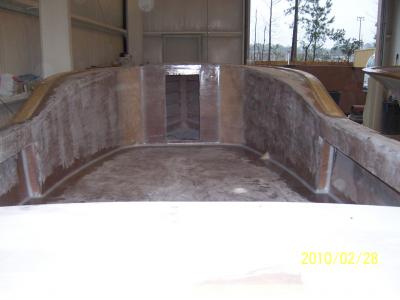
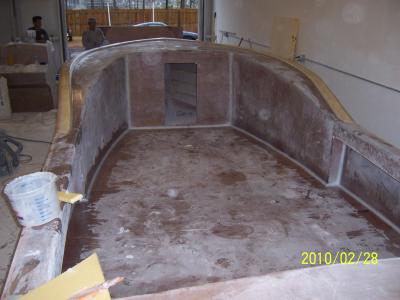
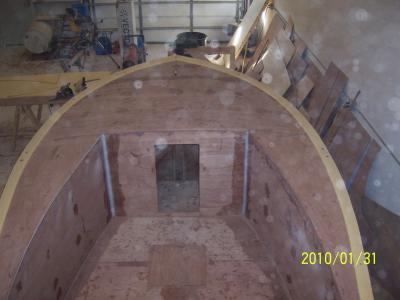
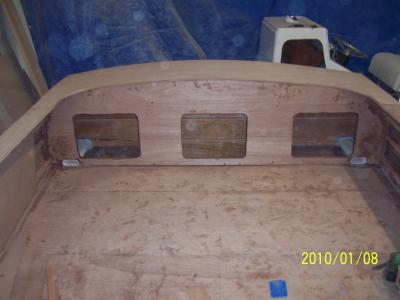
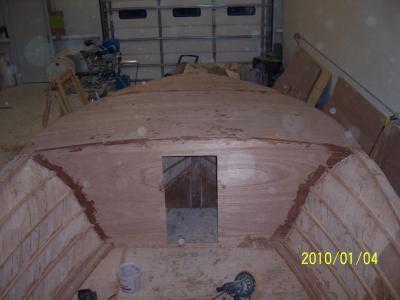
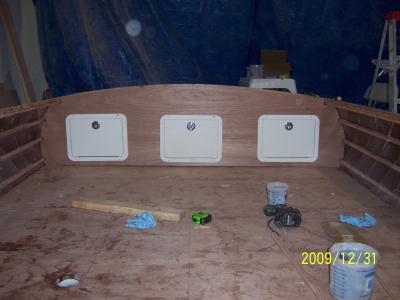
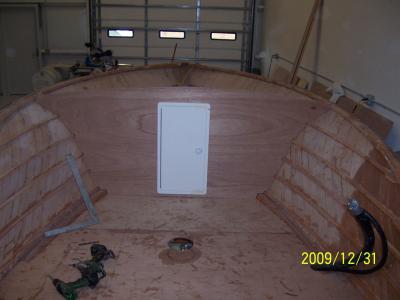
Got the front bulkhead epoxied in, front bow cap on, rear bulkhead with hatches cut to fit.
-
Now that the holidays are over, we hope to get some serious time in. Probably a couple more months after work and weekends. Had some time to figure out my scupper tubes as my transom area is 12" thick where my rear bulkhead is. I cut some 3" PVC pipe 14" long, bake in the oven at 350 for 4 minutes and formed my tubes using a plywood form in each end to hold shape until they cooled.